Honda CR-V: Conventional Brake Components
Honda CR-V (2006–2011) Service Manual / Brakes / Conventional Brake Components
Special Tools

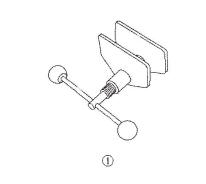
- Brake Caliper Piston Compresor
Component Location Index
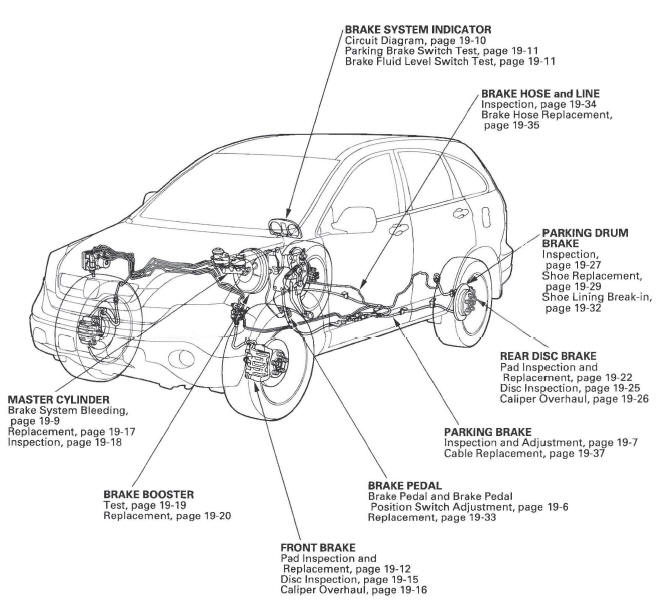
- BRAKE SYSTEM INDICATOR
- Circuit Diagram
- Parking Brake Switch Test
- Brake Fluid Level Switch Test
- BRAKE HOSE and LINE
- Inspection
- Brake Hose Replacement
- PARKING DRUM BRAKE
- Inspection
- Shoe Replacement
- Shoe Lining Break-in
- REAR DISC BRAKE
- Pad Inspection and Replacement
- Disc Inspection
- Caliper Overhaul
- PARKING BRAKE
- Inspection and Adjustment
- Cable Replacement
- BRAKE PEDAL
- Brake Pedal and Brake Pedal Position Switch Adjustment
- Replacement
- FRONT BRAKE
- Pad Inspection and Replacement
- Disc Inspection
- Caliper Overhaul
- BRAKE BOOSTER
- Test
- Replacement
- MASTER CYLINDER
- Brake System Bleeding
- Replacement
- Inspection
READ NEXT:
 Brake System
Brake System Inspection and Test
Inspect the brake system components listed. Repair or replace any parts that
are leaking or damaged.
Component Inspections
Brake System Test
Brake pedal sinks/fades
Front Brake
Front Brake Pad Inspection and Replacement
Special Tools Required
Brake caliper piston compressor 07 AAE-SEPA 101
CAUTION
Frequent inhalation of brake pad dust, regardless of
material composition, cou
Master Cylinder
Master Cylinder Replacement
NOTICE
Do not spill brake flu id on the vehicle; it may
damage the paint; if brake fluid gets on the paint,
wash it off immediately with water.
Be careful not to dam
SEE MORE:
Battery
WARNING
A battery can explode if you do not follow the
proper procedure, causing serious injury to anyone
nearby. Follow all procedures carefully and keep
sparks and open flames away from the battery.
Use an ED-18 Battery Tester, and follow the
manufacturer's procedures. If you don't have one of
the
To Change or Select Files
Use the SKIP button while an iPod is
playing to change files.
SKIP - Each time you press and
release
(preset 6), the player
skips forward to the beginning of the
next file. Press and release
(preset 5), to skip backward to
the beginning of the current file.
Press it again to skip t
© 2016-2026 Copyright www.hcrv.net
