Honda CR-V: Piston, Pin, and Connecting Rod Replacement
Disassembly
1. Remove the piston from the engine block.
2. Apply new engine oil to the piston pin snap rings (A), and turn them in the ring grooves until the end gaps are lined up with the cutouts in the piston pin bores (B).
NOTE: Take care not to damage the ring grooves.

3. Remove both snap rings. Start at the cutout in the piston pin bore. Remove the snap rings carefully so they do not go flying or get lost. Wear eye protection.
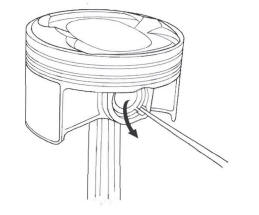
4. Heat the piston and connecting rod assembly to about 158 ºF (70 ºC), then remove the piston pin.
Inspection
NOTE: Inspect the piston, piston pin, and connecting rod when they are at room temperature.
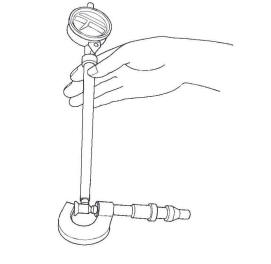
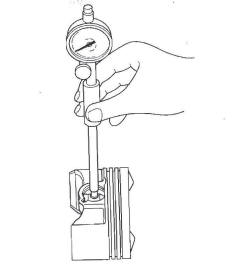
1. Measure the diameter of the piston pin.
Piston Pin Diameter
Standard (New): 21.961-21.965 mm
(0.8646-0.8648 in.)
Service Limit: 21.953 mm (0.8643 in.)
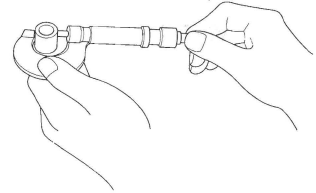
2. Zero the dial indicator to the piston pin diameter.
3. Check the difference between the piston pin diameter and piston pin hole diameter in the piston.
Piston Pin-to-Piston Clearance
Standard (New): -0.005 to +0.002 mm
(-0.00020 to +0.00008 in.)
Service Limit: 0.005 mm (0.0002 in.)
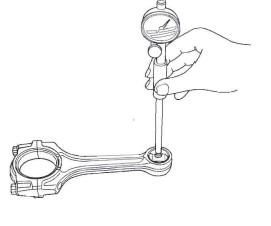
4. Measure the piston pin-to-connecting rod clearance.
Piston Pin-to-Connecting Rod Clearance
Standard (New): 0.005-0.015 mm
(0.0002-0.0006 in.)
Service Limit: 0.02 mm (0.0008 in.)
Reassembly
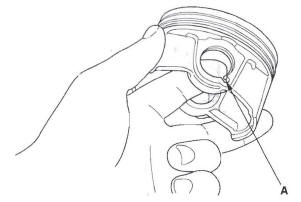
1. Install a piston pin snap ring (A).
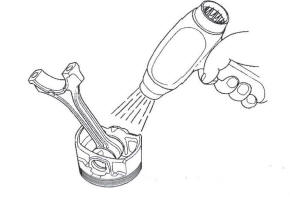
2. Coat the piston pin bore in the piston, the bore in the connecting rod, and the piston pin with new engine oil.
3. Heat the piston to about 158 ºF (70 ºC).
4. Assemble the piston (A) and connecting rod (B) with the arrow (C) and the embossed mark (D) on the same side. Install the piston pin (E).
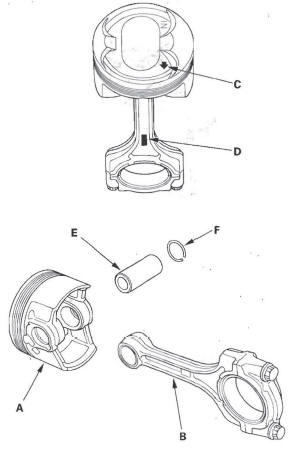
5. Install the remaining snap ring (F).
6. Turn the snap rings in the ring grooves until the end gaps are positioned at the bottom of the piston.
READ NEXT:
 Piston Ring Replacement
1. Remove the piston from the engine block.
2. Using a ring expander (A), remove the old piston
rings (B).
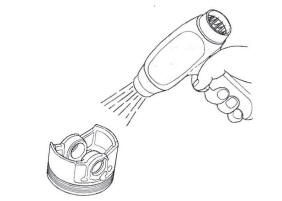
3. Clean all ring grooves thoroughly with a squared-off
broken ring or ring groove cleaner
Crankshaft Installation
Special Tools Required
Driver 077 49-00 10000
Oil seal driver attachment, 96 mm 07ZAD-PNAA.100
1. Check the connecting rod bearing clearance with
plastigage.
2. Check the main bearing clearance w
Oil Pan Installation
1. Remove all of the old liquid gasket from the oil pan
mating surfaces, bolts, and bolt holes.
2. Clean and dry the oil pan mating surfaces.
3. Apply liquid gasket, P/N 08717-0004,08718-0001,
08718
SEE MORE:
Heater Unit/Core
Replacement
SRS components are located in this area. Review the
SRS component locations, and the
precautions and procedures before
doing repairs or service.
1. Make sure you have anti-theft codes for the audio
system and the navigation system (if equipped).
2. Make sure the ignition is OFF, then disconnect the
General Troubleshooting Information
How to Check for DTCs with the Honda
Diagnostic System (HDS)
When the powertrain control module (PCM) senses an
abnormality in the input or output system, the D
indicator (A) in the gauge control module (tach) (B) will
usually blink.
When the Honda Diagnostic System (HDS) is connected
to the data l
