Honda CR-V: EGR Passage Removal and Installation
Removal
1. Drain the engine coolant.
2. Remove the air cleaner housing.
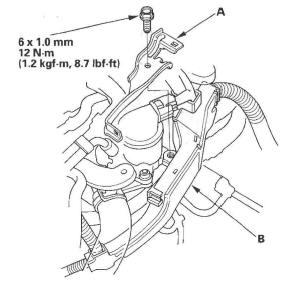
3. Remove the harness holder (A) from the bracket, then remove the harness holder bracket (B).
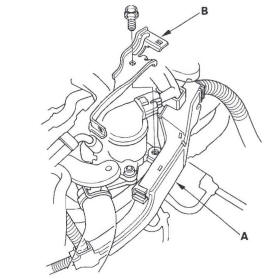
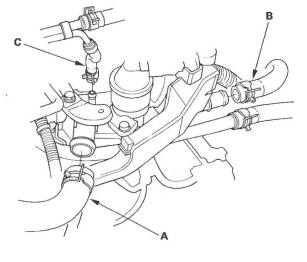
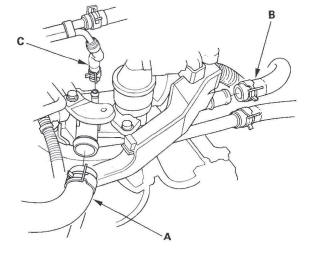
4. Remove the upper radiator hose (A), heater hose (B), and water bypass hose (C).
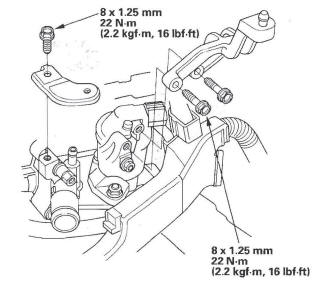
5. Remove the air cleaner housing brackets.

6. Disconnect the exhaust gas recirculation (EGR) valve connector.
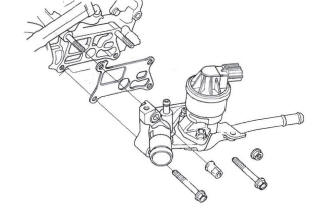
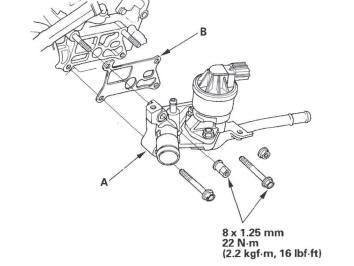
7. Remove the EGR passage.
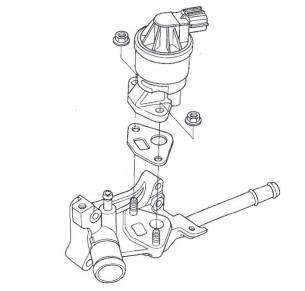
8. Remove the EGR valve.
Installation
1. Install the EGR valve (A) with a new gasket (B).
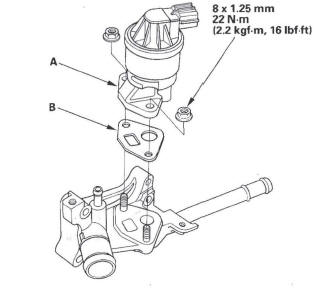
2. Install the EGR passage (A) with a new gasket (B).
3. Connect the EGR valve connector.
4. Install the air cleaner housing brackets.
5. Install the upper radiator hose (A), heater hose (B), and water bypass hose (C).
6. Install the harness holder bracket (A), then install the harness holder (B).
7. Install the air cleaner housing.
8. Refill the radiator with engine coolant, and bleed the air from the cooling system with the heater valve open (see step 6).
READ NEXT:
 Fan, Fan Motor, Shroud Removal and Installation
Removal
1. Remove the hood support rod, then use it as shown
to prop the hood in the wide-open position.
2. Remove the bulkhead cover.
3. Disconnect the fan motor connectors (A) and hood
switch conn
Radiator Replacement
For Japan-produced Model
1. Drain the engine coolant.
2. Remove the hood support rod, then use it as shown
to prop the hood in the wide-open position.
3. Remove the bulkhead cover.
4. Remove the co
Fan Controls
Component Location Index
RADIATOR FAN RELAY
A/C CONDENSER FAN RELAY
FAN CONTROL RELAY
A/C CONDENSER FAN ASSEMBLY
RADIATOR FAN ASSEMBLY
ENGINE COOLANT TEMPERATURE
(ECT) SENSOR 1
E
SEE MORE:
Headlight Adjustment
CAUTION
Headlights become very hot during use; do not
touch them or any attaching hardware immediately
after they have been turned off.
Before adjusting the headlights:
Park the vehicle on a level surface.
Make sure the tire pressures are correct.
The driver or someone who weighs the same should
Tire Labeling
The tires that came on your vehicle
have a number of markings. Those
you should be aware of are described
below.
Tire Size
Whenever tires are replaced, they
should be replaced with tires of the
same size. Below is an example of
tire size with an explanation of what
each component m
