Honda CR-V: Wipers/Washers
Honda CR-V (2006–2011) Service Manual / Body Electrical / Wipers/Washers
Component Location Index
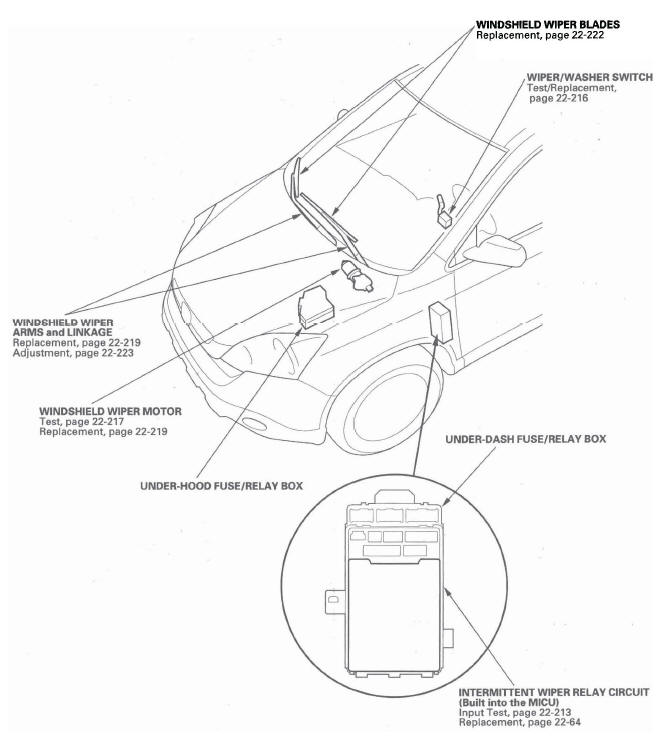
- WINDSHIELD WIPER BLADES
- WIPER/WASHER SWITCH
- WINDSHIELD WIPER ARMS and LINK
- WINDSHIELD WIPER MOTOR
- UNDER-DASH FUSE/RELAY BOX
- UNDER-HOOD FUSE/RELAY BOX
- INTERMITTENT WIPER RELAY CIRCUIT (Built into the MICU)
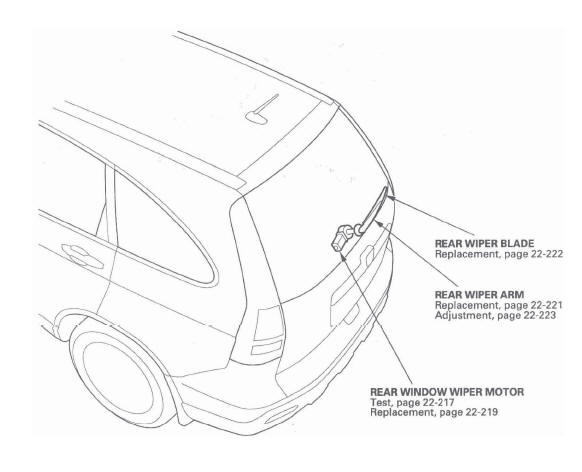
- REAR WIPER BLADE
- REAR WIPER ARM
- REAR WINDOW WIPER MOTOR
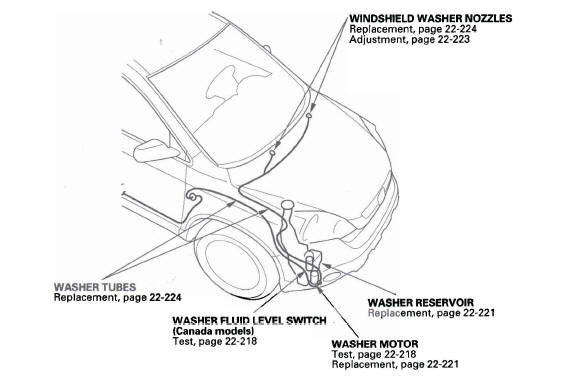
- WINDSHIELD WASHER NOZZLES
- WASHER RESERVOIR
- WASHER MOTOR
- WASHER FLUID LEVEL SWITCH (Canada models)
- WASHER TUBES

- REAR WINDOW WASHER NOZZLE
- WASHER TUBE
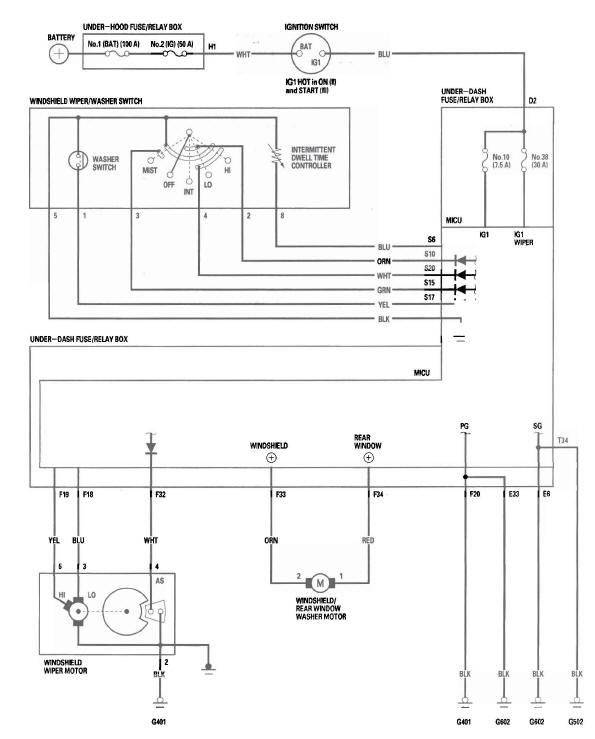
Circuit Diagram - Windshield
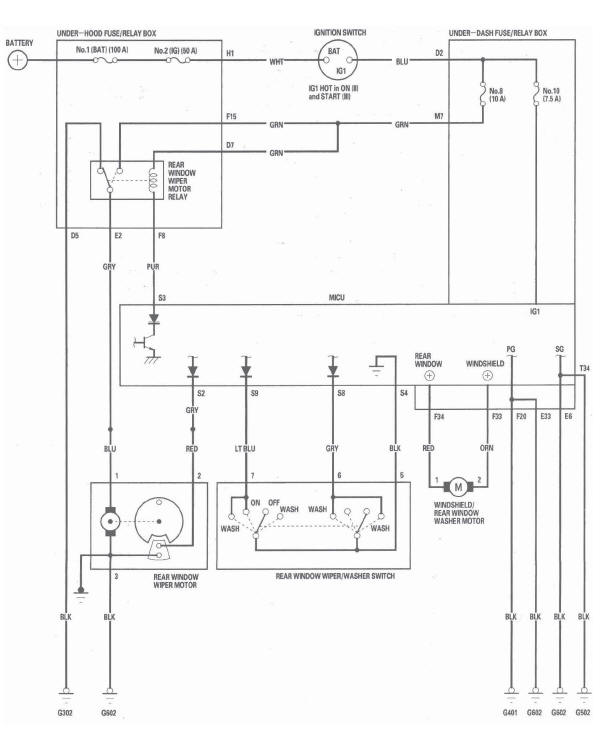
Circuit Diagram - Rear Window
READ NEXT:
 DTC Troubleshooting
DTC B1028: Rear Window Wiper Motor (As)
Signal Error
NOTE: If you are troubleshooting multiple DTCs, be
sure to follow the instructions in B-CAN System
Diagnosis Test Mode A.
1. Clear the DTCs with th
MICU Input Test
1. Before testing, troubleshoot the B-CAN System Diagnosis Test Mode A, and
check the No.8
(10 A), No. 10 (7.5 A), and No. 38 (30 A) fuses in the under-dash fuse/relay
box.
2. Disconnect under-dash
Wiper/Washer Switch Test/Replacement
1. Remove the steering column covers.
2. Disconnect the dashboard wire harness 8P
connector (A) from the wiper/washer switch (B).
3. Remove the two screws, then slide out the wiper/
washer switch.
SEE MORE:
Driver’s Seat Power Adjustments
EX-L and Canadian EX models
See pages for important safety
information and warnings about how to
properly position the seats and seatbacks.
The controls for the power
adjustable driver’s seat are on the
outside edge of the seat bottom. You
can adjust the seat with the ignition
switch
VSA OFF Switch
This switch is under the driver’s side
vent. To turn the VSA system on and
off, press and hold it until you hear a
beep.
When VSA is off, the VSA off
indicator comes on as a reminder.
Press and hold the switch again. It
turns the system back on.
VSA is turned on every time you
sta
© 2016-2026 Copyright www.hcrv.net
