Honda CR-V: Propeller Shaft
Propeller Shaft Inspection
Universal Joint and Boots
1. Set the parking brake, then shift the transmission to the N position.
2. Raise the vehicle on a lift.
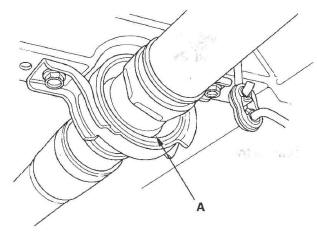
3. Check the center support bearing (A) for excessive play or rattle. If the center support has excessive play or rattle, replace the propeller shaft assembly.
4. Check the universal joint boots for damage and deterioration. If the boots are damaged or deteriorated, replace the propeller shaft assembly.
5. Check the universal joints for excessive play or rattle. If the universal joints have excessive play or rattle, replace the propeller shaft assembly.
Propeller Shaft Runout
6. Install a dial indicator with its needle on the center of No.1 propeller shaft or No.2 propeller shaft.
7. Turn the other propeller shaft slowly and check the runout. Repeat this procedure for the other propeller shaft.
No.1 Propeller Shaft Runout
Service Limit: 1.5 mm (0.06 in.)
No.2 Propeller Shaft Runout Service Limit: 1.5 mm (0.06 in.)
8. If the runout on either propeller shaft exceeds the service limit, replace the propeller shaft assembly.
Propeller Shaft Removal
1. Raise the vehicle on a lift.
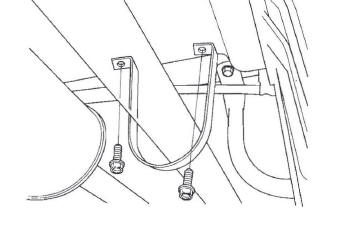
2. Remove the No.1 propeller shaft protector.

3. Remove the No. 2 propeller shaft protector.
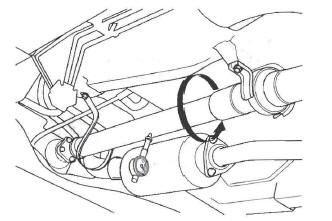
4. Make a reference mark (A) across the No.1 propeller shaft (B) and transfer companion flange (C).
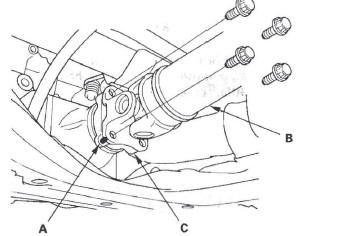
5. Separate the No.1 propeller shaft from the transfer assembly.
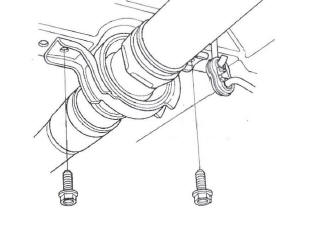
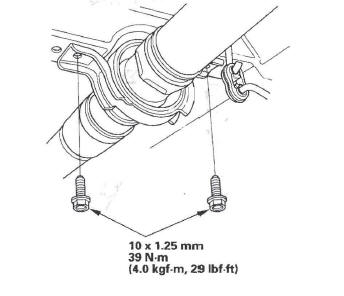
6. Remove the center support bearing mounting bolts.
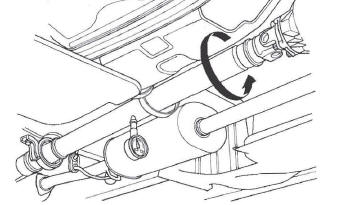
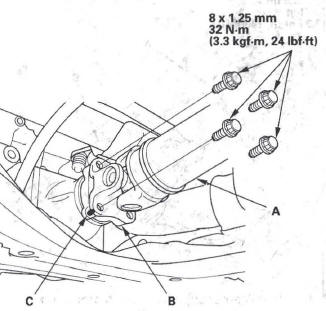
7. Make a reference mark (A) across the No.2 propeller shaft (B) and rear differential companion flange (C).
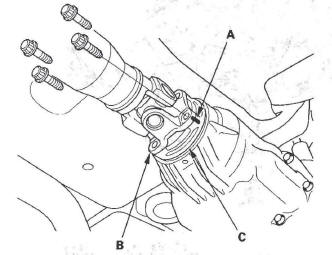
8. Separate the No.2 propeller shaft from the rear differential, then remove the propeller shaft assembly.
Propeller Shaft Installation
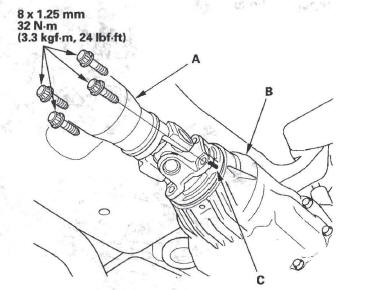
1. Install the No.2 propeller shaft (A) onto the rear differential (B) by aligning the reference mark (C) you made. Make sure you use new bolts.
2. Install the center support bearing mounting bolts.
Make sure you use new bolts.
3. Install the No.1 propeller shaft (A) onto the transfer companion flange (B) by aligning the reference mark (C) you made. Make sure you use new mounting bolts.
4. Install the No.2 propeller shaft protector.
5. Install the No.1 propeller shaft protector.
6. If you installed a new propeller shaft assembly, test drive the vehicle at 55 mph (88 km/h), and check for noise or vibration.
- If there is no noise or vibration, the repair is complete.
- If there is a noise or vibration, go to step 7.
7. Remove the mounting bolts from the No.2 propeller shaft at the rear differential companion flange. Note the current alignment of the No.2 propeller shaft to the rear differential companion flange.
8. Rotate the propeller shaft 180 degrees from its current alignment with the rear differential companion flange.
9. Install new mounting bolts, and tighten them to the specified torque.
READ NEXT:
 Steering
Special Tools
Piston Seal Ring Sizing Tool
Bushing Base
Piston Seal Ring Guide
Cylinder End Seal Slide
Locknut Wrench, 40 mm
Ball Joint Remover, 28 mm
Valve Seal Ring Sizing Tool
Sleeve Sea
Symptom Troubleshooting
Hard Steering
1. Check the power assist.
Is the initial turning load more than 34 N (3.5 kgf,
7.7 Ibf) ?
YES-Go to step 2.
NO-Power assist is OK.
2. Connect the P/S joint adapter (pump), P/S joint
Pump Pressure Test
Pump Pressure Test with T/N 07406-0010001
Special Tools Required
P/S joint adapter (pump) 07ZAK-S7C0100
P/S joint adapter (hose) 07ZAK-S7C0200
P/S pressure gauge 07406-0010001
Check the fluid pre
SEE MORE:
Instrument Panel Brightness
You can change the instrument panel
brightness only when the light
switch is on.
Turn the knob on the lower part of
the instrument panel to adjust the
brightness.
You will hear a beep when maximum
or minimum brightness is reached.
To reduce glare at night, the
instrument panel
DTC Troubleshooting
DTC B1028: Rear Window Wiper Motor (As)
Signal Error
NOTE: If you are troubleshooting multiple DTCs, be
sure to follow the instructions in B-CAN System
Diagnosis Test Mode A.
1. Clear the DTCs with the HDS.
2. Turn the. ignition switch OFF, and then back ON (II).
3. Operate the rear window wiper f
