Honda CR-V: Oil Pump Overhaul
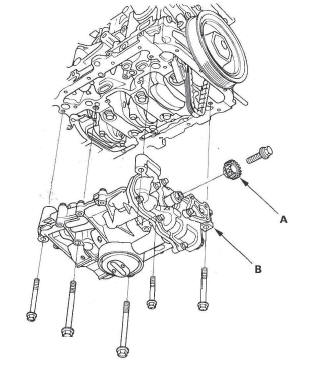
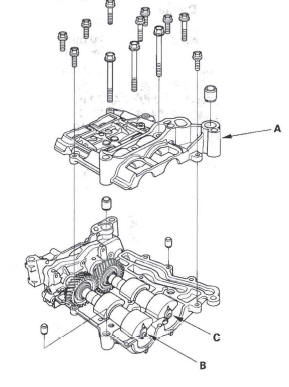
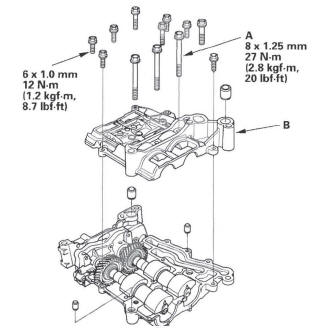
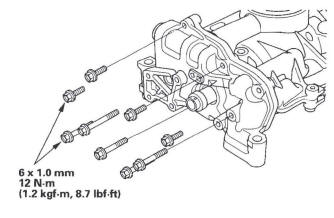
Exploded View
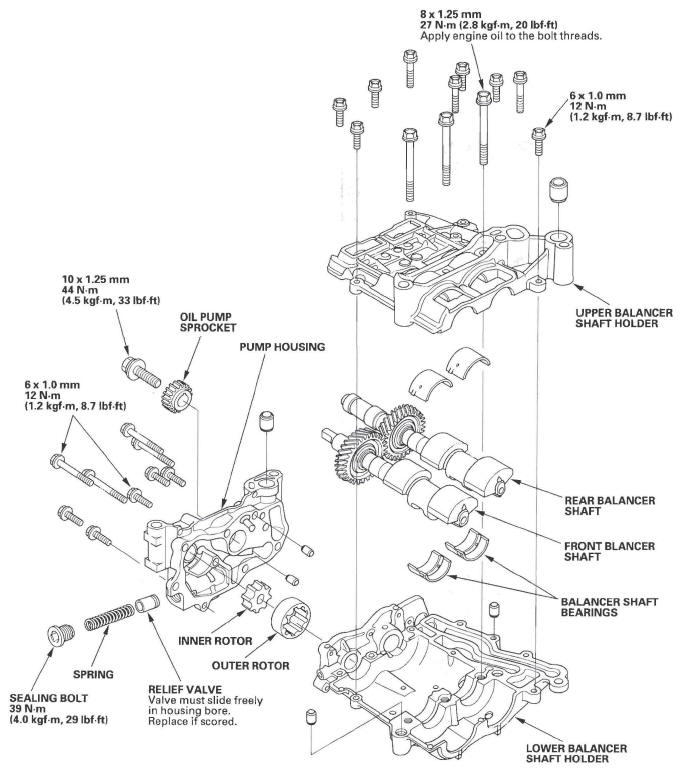
Oil Pump Removal
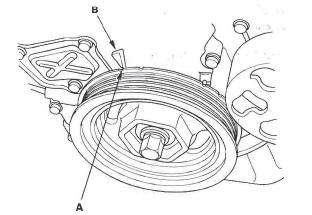
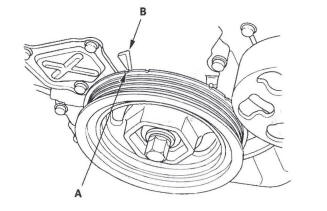
1. Turn the crankshaft pulley so its top dead center (TDC) mark (A) lines up with the pointer (B).
2. Remove the oil pan.
3. Remove and discard the oil pump chain tensioner.
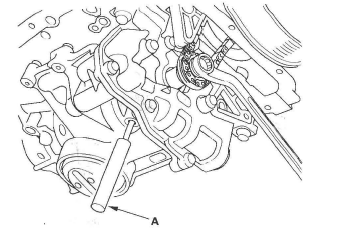
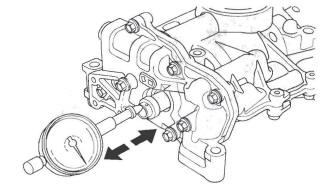
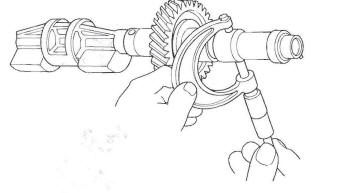
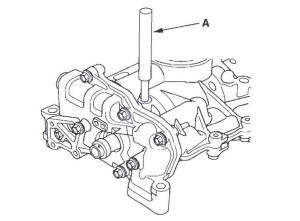
4. To hold the rear balancer shaft, insert a 6 mm pin driver (A) into the maintenance hole in the lower balancer shaft holder and through the rear balancer shaft.
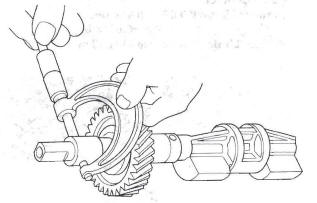
5. Loosen the oil pump sprocket mounting bolt.
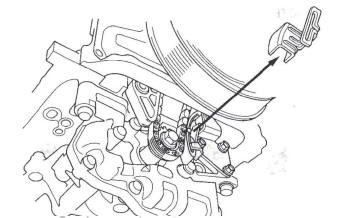
6. Remove the oil pump sprocket (A), then remove the oil pump (B).
Oil Pump Inspection
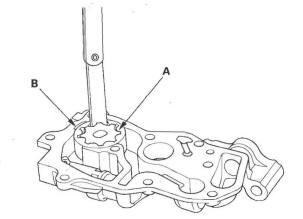
1. Remove the pump housing.

2. Check the inner-to-outer rotor radial clearance between the inner rotor (A) and outer rotor (B). If the inner-to-outer rotor radial clearance exceeds the service limit, replace the oil pump.
Inner Rotor-to-Outer Rotor Radial Clearance
Standard (New): 0.06-0.16 mm (0.002-0.006 in.)
Service Limit: 0.20 mm (0.008 in.)
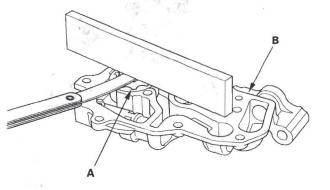
3. Check the housing-to-rotor axial clearance between the rotor (A) and pump housing (B). If the housing-to-rotor axial clearance exceeds the service limit, replace the oil pump.
Housing-to-Rotor Axial Clearance
Standard (New): 0.035-0.070 mm
(0.0014-0.0028 in.)
Service Limit: 0.12 mm (0.005 in.)
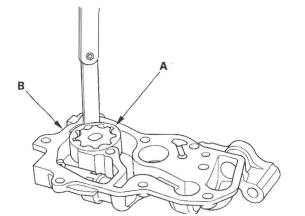
4. Check the housing-to-outer rotor radial clearance between the outer rotor (A) and pump housing (B).
If the housing-to-outer rotor radial clearance exceeds the service limit, replace the oil pump.
Housing-to-Outer Rotor Radial Clearance
Standard (New): 0.15-0.21 mm (0.006-0.008 in.)
Service Limit: 0.23 mm (0.009 in.)
5. Inspect both rotors and the pump housing for scoring or other damage. Replace parts if necessary.
Balancer Shaft Inspection
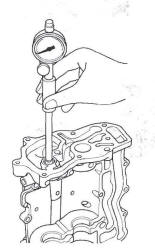
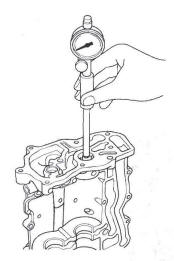
1. Seat the balancer shaft by pushing it away from the oil pump sprocket end of the oil pump.
2. Zero the dial indicator against the end of the balancer shaft, then push the balancer shaft back and forth and read the end play.
Balancer Shaft End Play
Front Balancer Shaft:
Standard (New): 0.063-0.108 mm
(0.0025-0.0043 in.)
Service Limit: 0.14 mm (0.0055 in.)
Rear Balancer Shaft:
Standard (New): 0.063-0.108 mm
(0.0025-0.0043 in.)
Service Limit: 0.14 mm (0.0055 in.)
3. Remove the upper balancer shaft holder (with bearings) (A), then remove the front balancer shaft (B) and rear balancer shaft (C).
4. Measure the inner diameter of the No.1 bearing for the front balancer shaft hole and the rear balancer shaft hole.
Bearing Inner Diameter
Front:
Standard (New): 20.000-20.020 mm
(0.7874-0.7882 in.)
Service limit: 20.03 mm (0.789 in.)
Rear:
Standard (New): 24.000-24.020 mm
(0.9449-0.9457 in.)
Service limit: 24.03 mm (0.946 in.)
Front
Rear
5. Measure the diameters of the No.1 journals on the front balancer shaft and rear balancer shaft.
Journal Diameter
Front:
Standard (New): 19.938-19.950 mm
(0.7850-0.7854 in.)
Service limit: 19.92 mm (0.784 in.)
Rear:
Standard (New): 23.938-23.950 mm
(0.9424-0.9429 in.)
Service limit: 23.92 mm (0.942 in.)
Front
Rear
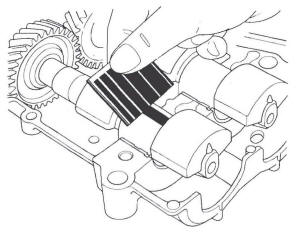
6. Clean both balancer shaft No.2 journals and bearing halves with a clean shop towel.
7. Place one strip of plastigage across each No. 2 journal.
8. Reinstall the bearings and upper balancer shaft holder, then torque the bolts.
NOTE: Do not rotate the balancer shafts during inspection.
9. Remove the upper balancer shaft holder and bearings again, and measure the widest part with the plastigage. If the balancer shaft No.2 journal oil clearance is out-of-tolerance, install new bearings, and recheck. If it is still out-of-tolerance, replace the balancer shafts.
No. 2 Journal Oil Clearance
Standard (New): 0.060-0.120 mm
(0.0024-0.0047 in.)
Service Limit: 0.15 mm (0.006 in.)
10. Align the punch mark on the rear balancer shaft in the center of the two punch marks on the front balancer shaft, then install the balancer shafts on the lower balancer shaft holder.
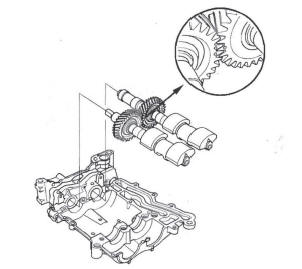
11. Apply engine oil to the threads of the 8 mm bolts (A).
12. Install the upper balancer shaft holder (B).
13. Install the pump housing.
Oil Pump Installation
1. Make sure the No. 1 piston top dead center (TDC) mark (A) lines up with the pointer (B).
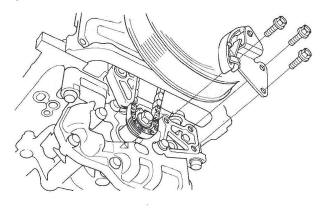
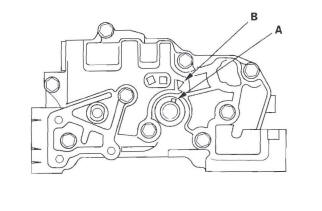
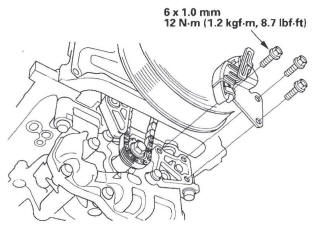
2. Align the dowel pin (A) on the rear balancer shaft with the mark (B) on the oil pump.
3. To hold the rear balancer shaft, insert a 6 mm pin driver (A) into the maintenance hole in the lower balancer shaft holder and through the rear balancer shaft.
4. Apply engine oil to the threads of the oil pump mounting bolts (A).

5. Loosely install the oil pump (B), then install the oil pump sprocket C).
6. Remove the 6 mm pin driver (D).
7. Tighten the oil pump mounting bolts.
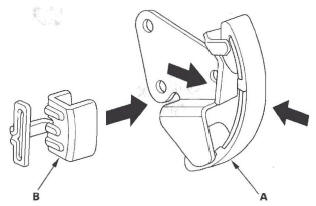
8. Squeeze the new oil pump chain tensioner (A), then install the set clip (B) on it as shown.
NOTE: The set clip is supplied with the oil pump chain tensioner.
9. Install the new oil pump chain tensioner.
10. Remove the set clip from the oil pump chain tensioner.
11. Install the oil pan.
READ NEXT:
 Intake Manifold and Exhaust System
Intake Manifold Removal and Installation
Exploded View
Removal
1. Remove the hood support rod, then use it as shown
to prop the hood in the wide-open position.
2. Remove the bulkhead cover.
3. Disc
Cooling System
Component Location Index
COOLANT SEPARATOR
EXHAUST GAS RECIRCULATION
(EGR) PASSAGE
THERMOSTAT
RADIATOR
ENGINE COOLANT TEMPERATURE
(ECT) SENSOR 2
RADIATOR FAN ASSEMBLY
A/C COND
SEE MORE:
Introduction
Congratulations! Your selection of a 2010 Honda CR-V was a wise
investment. It will give you years of driving pleasure.
One of the best ways to enhance the enjoyment of your new vehicle is to
read this manual. In it, you will learn how to operate its driving controls and
convenience items. Af
Damper/Spring
Damper/Spring Removal and Installation
Removal
1. Raise the rear of the vehicle, and support it with safety stands in the
proper locations.
2. Remove the rear wheel.
3. Remove the lid (A) on the cargo area side trim
panel by releasing the hooks (B).
4. Remove the flange nuts (C) from the top o
