Honda CR-V: Intake Manifold and Exhaust System
Intake Manifold Removal and Installation
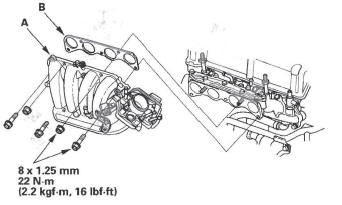
Exploded View

Removal
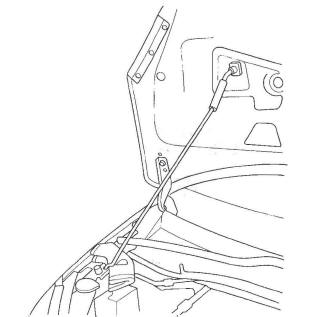
1. Remove the hood support rod, then use it as shown to prop the hood in the wide-open position.
2. Remove the bulkhead cover.
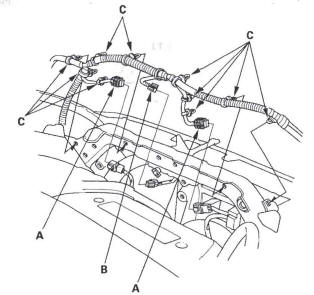
3. Disconnect the fan motor connectors (A) and hood switch connector (B), then remove the harness clips (C).
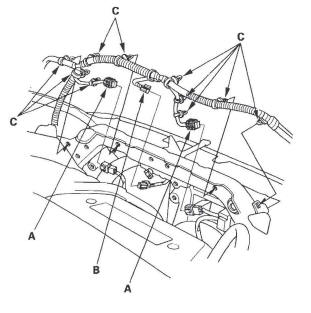
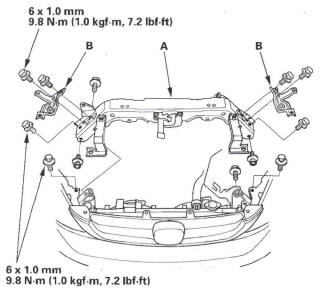
4. Remove the radiator upper brackets (A), then remove the front bulkhead (B).

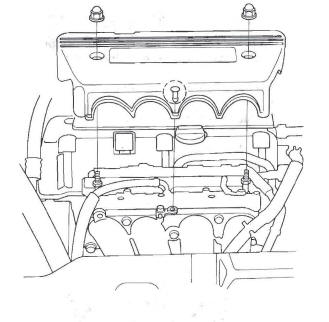
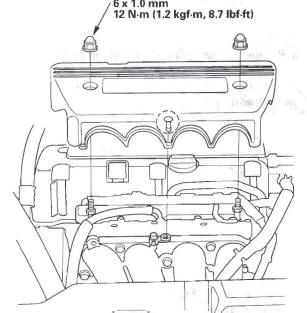
5. Remove the intake manifold cover.
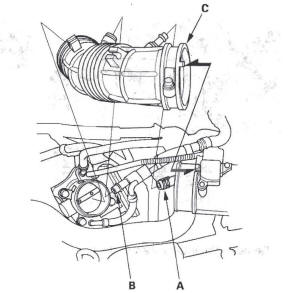
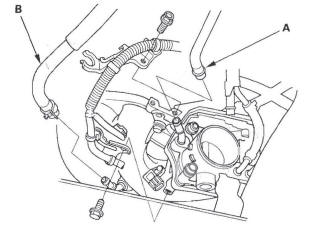
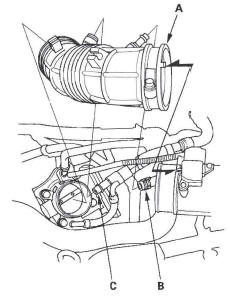
6. Remove the vacuum hose (A) and breather pipe (B), then remove the intake air duct (C).
7. Remove the engine wire harness connectors and wire harness clamps from the intake manifold.
- Manifold absolute pressure (MAP) sensor connector
- Throttle actuator connector
8. Remove the evaporative emission (EVAP) canister hose (A) and brake booster vacuum hose (B).
9. Remove the harness bracket mounting bolts.
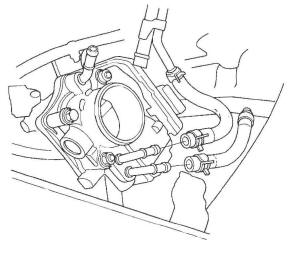
10. Remove the water bypass hoses, then plug the water bypass hoses.
11. Raise the vehicle on the lift to full height.
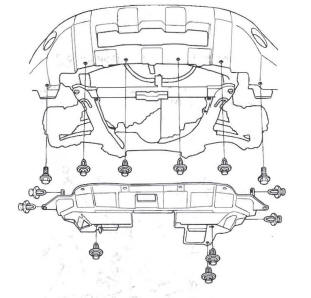
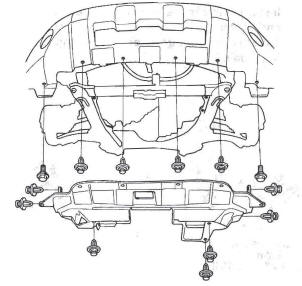
12. Remove the splash shield.
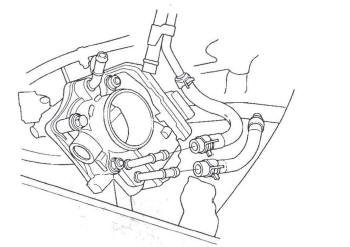
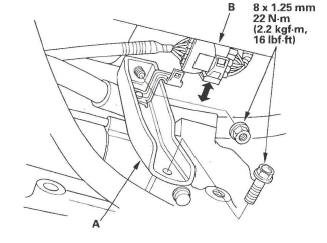
13. Remove the connector (A), then remove the intake manifold bracket (B).

14. Lower the vehicle on the lift.
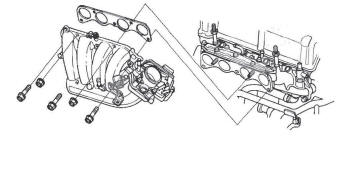
15. Remove the intake manifold.
Installation
1. Install the intake manifold (A) with a new gasket (B), and tighten the bolts and nuts in a crisscross pattern in two or three steps, beginning with the inner bolt.
2. Raise the vehicle on the lift to full height.
3. Install the intake manifold bracket (A), then install the connector (B).
4. Install the splash shield.
5. Lower the vehicle on the lift.
6. Install the water bypass hoses.
7. Install the EVAP canister hose (A) and brake booster vacuum hose (B).
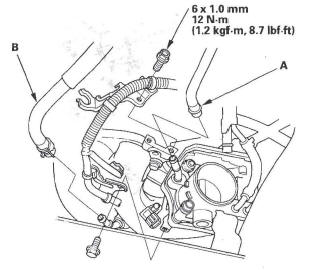
8. Install the harness bracket mounting bolts.
9. Connect the engine wire harness connectors, and install the wire harness clamps to the intake manifold.
- MAP sensor connector
- Throttle actuator connector
10. Install the intake air duct (A), then install the vacuum hose (B) and breather pipe (C).
11. Install the intake manifold cover.
12. Install the front bulkhead (A), then install the radiator upper brackets (B).
13. Apply body paint to the bulkhead mounting bolts.
14. Connect the fan motor connectors (A) and hood switch connector (B), then install the harness clips (C).
15. Install the bulkhead cover.
16. Clean up any spilled engine coolant.
17. After installation, check that all tubes, hoses, and connectors are installed correctly.
18. Refill the radiator with engine coolant, and bleed the air from the cooling system with the heater valve open (see step 6 ).
Exhaust Manifold Removal and Installation
1. Disconnect the air fuel ratio (A/F) sensor connector and secondary heated oxygen sensor (secondary HO2S) connector, then remove the three way catalytic converter (TWC) (see step 25).
2. Remove the under-cowl cover, then remove the strut brace.
3. Remove the rocker arm oil control solenoid. Remove the cover and exhaust manifold bracket, then remove the exhaust manifold.
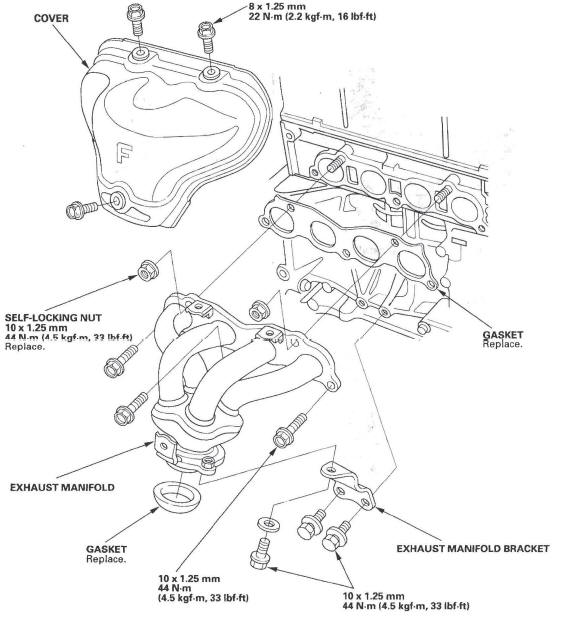
4. Install the exhaust manifold, and tighten the bolts and nuts in a crisscross pattern in two or three steps, beginning with the inner nut.
5. Install the other parts in the reverse order of removal.
Exhaust Pipe and Muffler Replacement
NOTE: Use new gaskets and self-locking nuts when reassembling.

READ NEXT:
 Cooling System
Component Location Index
COOLANT SEPARATOR
EXHAUST GAS RECIRCULATION
(EGR) PASSAGE
THERMOSTAT
RADIATOR
ENGINE COOLANT TEMPERATURE
(ECT) SENSOR 2
RADIATOR FAN ASSEMBLY
A/C COND
Radiator Cap Test
1. Remove the radiator cap (A), wet the seal with
engine coolant, then install it on the pressure tester
(B) (commercially available).
2. Apply a pressure of 93-123 kPa
(0.95-1.25 kgf/cm2, 14-18 psi)
SEE MORE:
ThreeWay Catalytic Converter
The three way catalytic converter
contains precious metals that serve
as catalysts, promoting chemical
reactions to convert the exhaust
gasses without affecting the metals.
The catalytic converter is referred to
as a three-way catalyst, since it acts
on HC, CO, and NOx. A replacement
Fan Controls
Component Location Index
RADIATOR FAN RELAY
A/C CONDENSER FAN RELAY
FAN CONTROL RELAY
A/C CONDENSER FAN ASSEMBLY
RADIATOR FAN ASSEMBLY
ENGINE COOLANT TEMPERATURE
(ECT) SENSOR 1
ENGINE COOLANT TEMPERATURE
(ECT) SENSOR 2
Symptom Troubleshooting Index
Circuit Diagram
Radiato
