Honda CR-V: Engine Lubrication
Honda CR-V (2006–2011) Service Manual / Engine Mechanical / Engine Lubrication
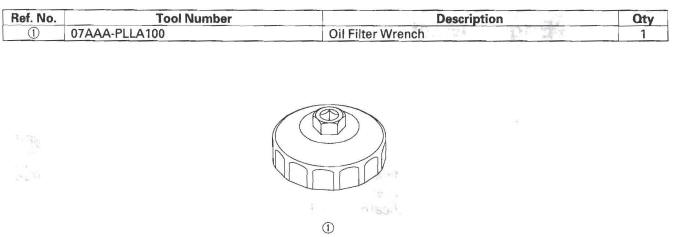
Special Tools
-
Oil Filter Wrench
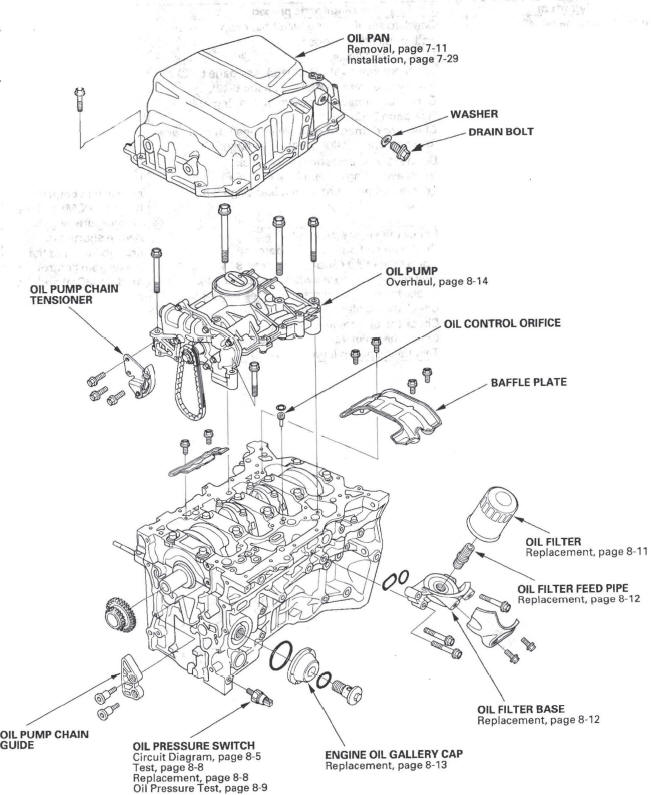
Component Location Index
-
OIL PAN
-
WASHER
-
DRAIN BOLT
-
OIL PUMP
-
OIL PUMP CHAIN GUIDE
-
OIL PUMP CHAIN TENSIONER
-
OIL CONTROL ORIFICE
-
OIL FILTER
-
OIL FILTER FEED PIPE
-
OIL FILTER BASE
-
ENGINE OIL GALLERY CAP
-
OIL PRESSURE SWITCH
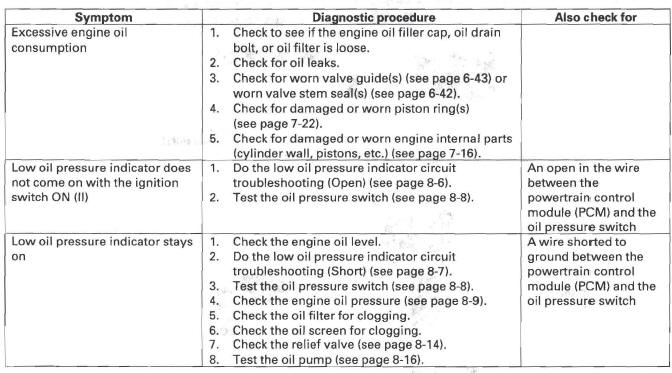
Symptom Troubleshooting Index
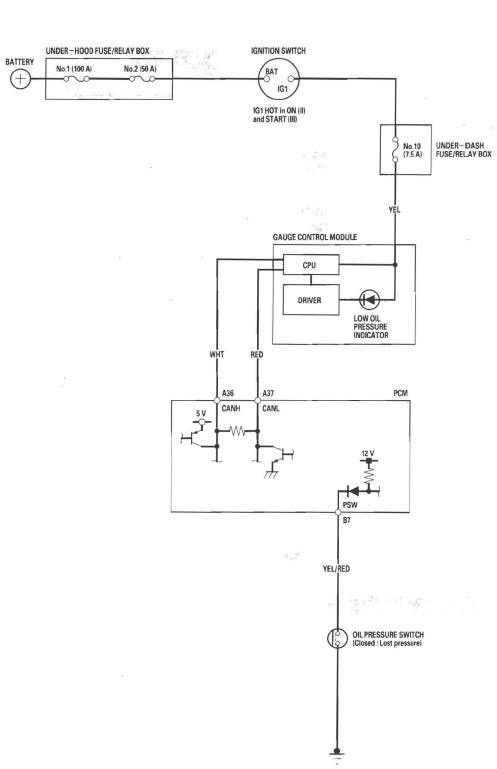
Low Oil Pressure Indicator Circuit Diagram
READ NEXT:
 Low Oil Pressure Indicator Circuit
Troubleshooting (Open)
Low Oil Pressure Indicator Circuit
Troubleshooting (Open)
1. Connect the Honda Diagnostic System (HDS) to the
data link connector (DLC) (see step 2).
2. Turn the ignition switch ON (II).
3. Make sure the HDS communicates with the vehicle
and the powertrain
Oil Pump Overhaul
Exploded View
Oil Pump Removal
1. Turn the crankshaft pulley so its top dead center
(TDC) mark (A) lines up with the pointer (B).
2. Remove the oil pan.
3. Remove and discard the oil pump chain ten
Intake Manifold and Exhaust System
Intake Manifold Removal and Installation
Exploded View
Removal
1. Remove the hood support rod, then use it as shown
to prop the hood in the wide-open position.
2. Remove the bulkhead cover.
3. Disc
SEE MORE:
System Diagnostic Mode
Start-up procedure and Diagnosis Menu
1. Turn the ignition switch to the ON (II) position.
Press and hold the Menu, the Map/Guide, and the
Cancel buttons. Keep them pressed for
approximately 3 seconds. The display screen then
goes directly to the Diagnostic Menu.
DIAGNOSTIC MENU SCREEN
2. After th
Rear Door
Rear Door Panel Removal/Installation
Special Tools Required
KTC trim tool set SOJATP2014 *
Trim pad remover, Snap-on A 177 A or equivalent,
commercially available
* Available through the American Honda Tool and
Equipment Program; call 888-424-6857
NOTE:
Use the appropriate tool from the KTC
© 2016-2026 Copyright www.hcrv.net
