Honda CR-V: Frame
Honda CR-V (2006–2011) Service Manual / Body / Frame
Under-cowl Panel Replacement
NOTE: Take care not to scratch the body.
1. Remove these items:
- Windshield wiper arms
- Front fender trim, both sides
- Cowl covers
2. Remove the bolts and nuts, disconnect the connector (A) and remove the grommet (B), then remove the under-cowl panel (C).
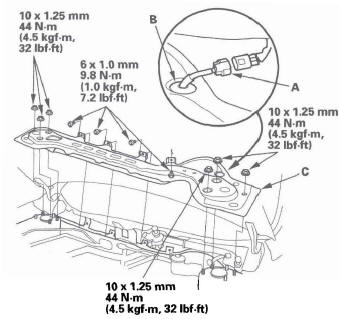
3. Install the under-cowl panel in the reverse order of removal.
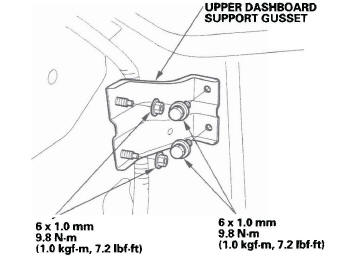
Upper Dashboard Support Gusset Replacement
Upper Dashboard Support Gusset Torque
NOTE: Take care not to scratch the body.
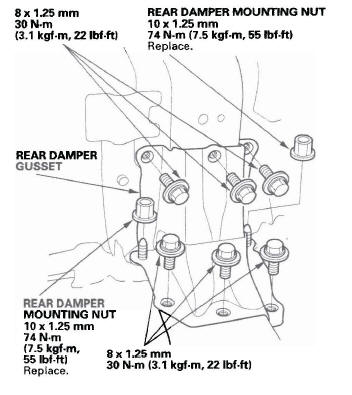
Rear Damper Gusset Replacement
Rear Damper Gusset Torque
NOTE: Take care not to scratch the body.
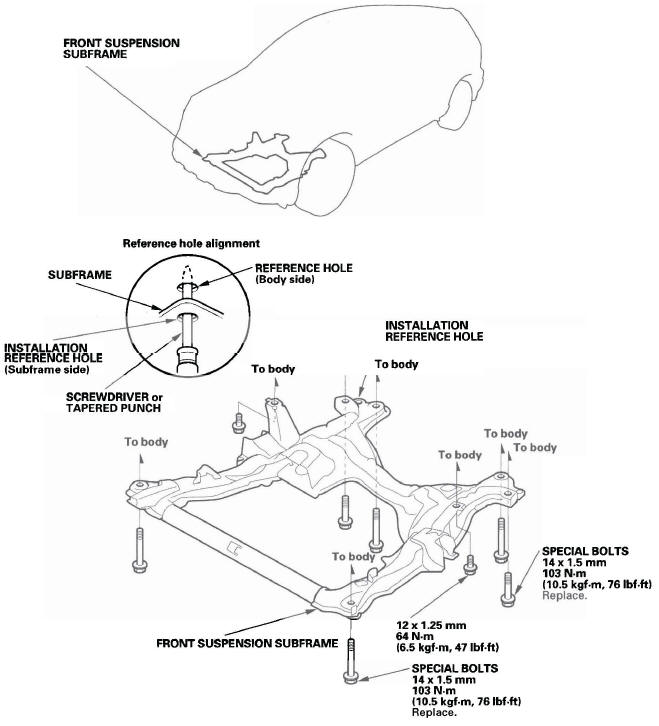
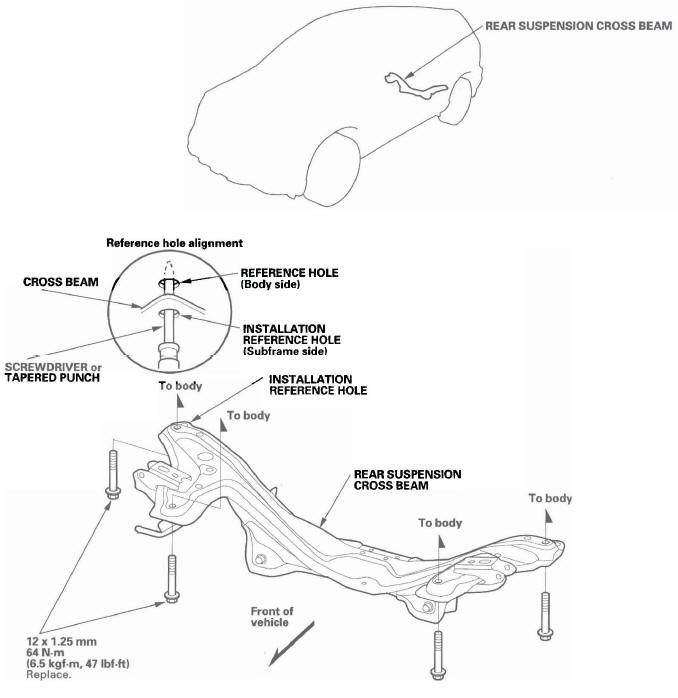
Subframe Replacement
Front Subframe Torque
NOTE:
- After loosening the subframe mounting bolts, be sure to replace them with new ones.
- When installing, align both installation reference holes in the subframe with both reference holes in the body using a screwdriver or tapered punch as a guide.
Rear Subframe Torque
NOTE:
- After loosening the subframe mounting bolts, be sure to replace them with new ones.
- When installing, align both installation reference holes in the subframe with both reference holes in the body using a screwdriver or tapered punch as a guide.
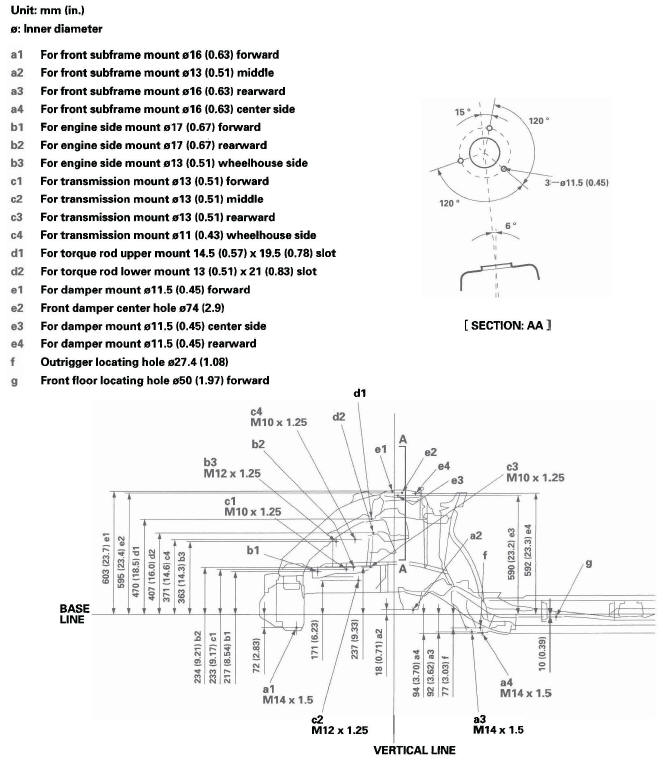
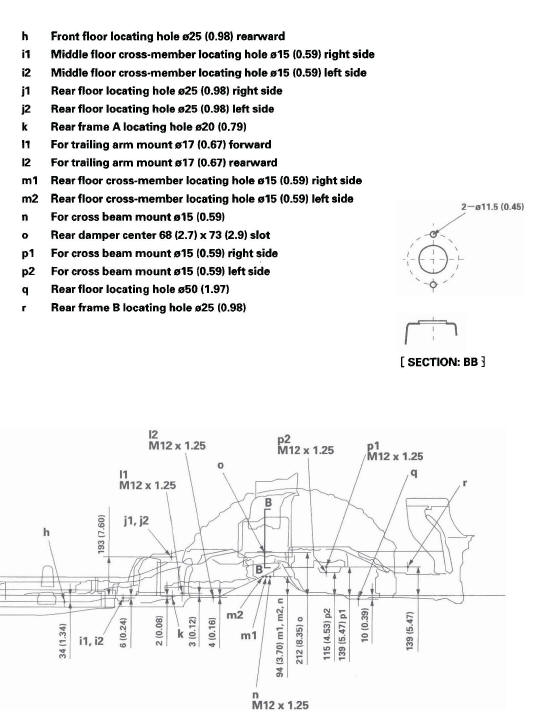
Frame Repair Chart
Top View
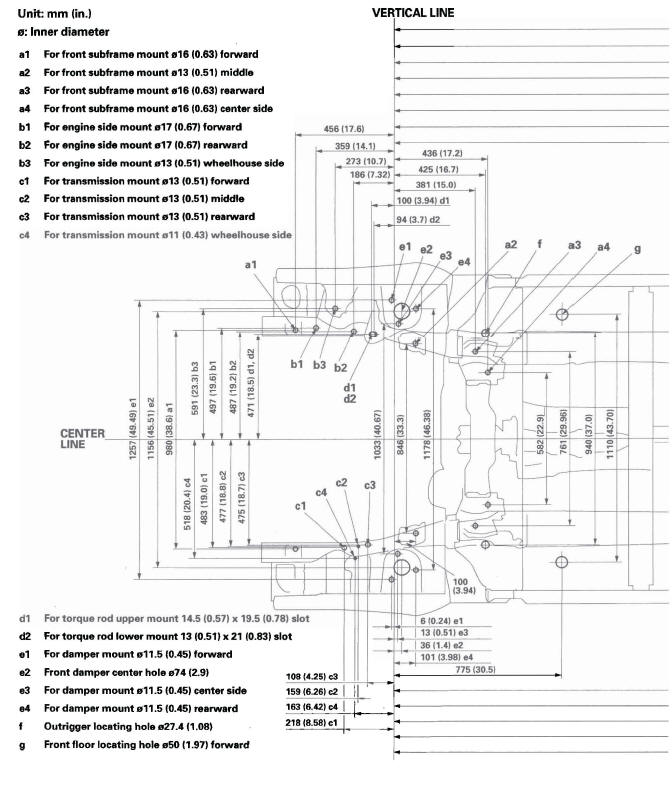
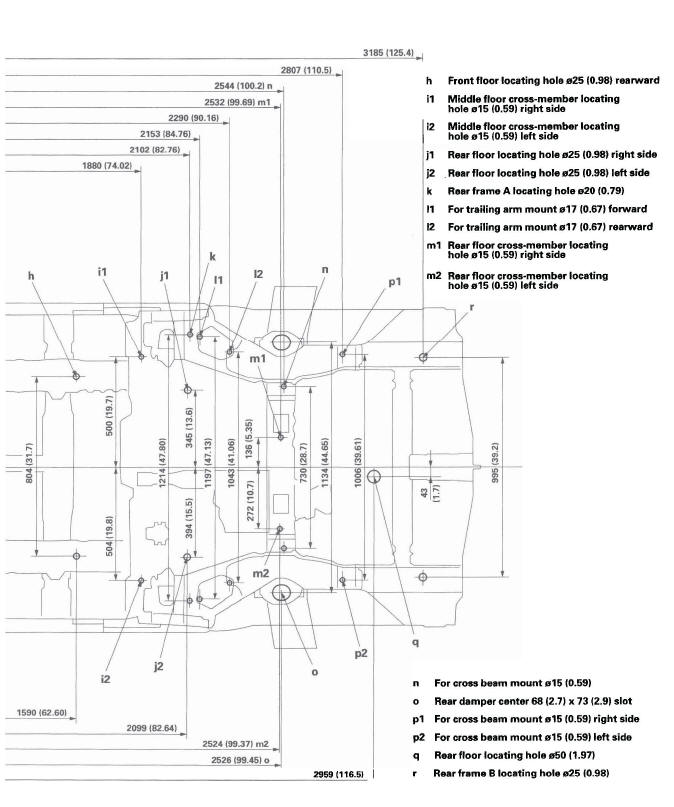
Side View
READ NEXT:
 HVAC (Heating, Ventilation, and Air Conditioning)
Special Tools
Backprobe set
Component Location Index
SERVICE VALVE (HIGH-PRESSURE SIDE)
SERVICE VALVE (LOW-PRESSURE SIDE)
EVAPORATOR CORE (Located-in the heater unit)
RECEIVER/DRYER DESIC
A/C Service Tips and Precautions
WARNING
Compressed air mixed with the R-134a forms a
combustible vapor.
The vapor can burn or explode causing serious
injury.
Never use compressed air to pressure test
R-134a service equipment
System Description
The air conditioning system removes heat from the passenger compartment by
transferring heat from the ambient air
to the evaporator. The evaporator cools the air with the refrigerant that is
circula
SEE MORE:
MICU Input Test
NOTE: Before testing, troubleshoot the B-CAN System Diagnosis Test Mode A.
1. Turn the ignition switch OFF.
2. Disconnect the under-dash fuse/relay box connectors E, F, G, K, R, and T.
NOTE: All connector views are wire side of female terminals.
UNDER-DASH FUSE/RELAY BOX CONNECTOR E (42P)
UNDER-D
Tailgate
Tailgate Adjustment
NOTE:
Have an assistant help you when adjusting the
tailgate.
Take care not to scratch the tailgate, body, and other
related parts.
Put on gloves to protect your hands.
1. Remove these items:
Quarter pillar glass trim, both sides
Tailgate weatherstrip, as needed
Cargo
© 2016-2026 Copyright www.hcrv.net
