Honda CR-V: Engine Removal
- Universal eyelet 07AAK-SNAA120
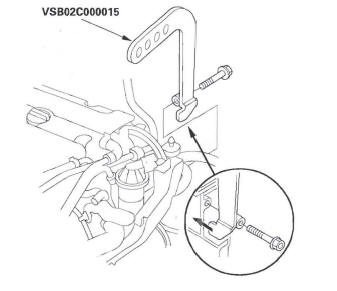
- Engine hanger adapter VSB02C000015 *
- Front subframe adapter VSB02C000016 *
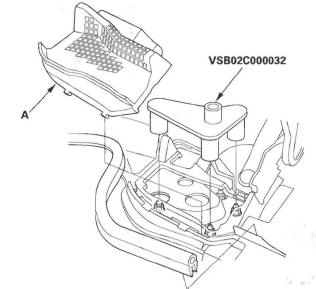
- CR-V engine hanger adapter VSB02C000032 *
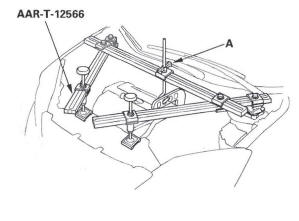
- Engine support hanger, A and Reds AAR-T-12566 *
* : Available through American Honda Tool and Equipment Program, 1 -888-424-6857
NOTE:
- Use fender covers to avoid damaging painted surfaces.
- To avoid damaging the wiring and terminals, unplug the wiring connectors carefully while holding the connector portion.
- Mark all wiring and hoses to avoid misconnection.
Also, be sure that they do not contact other wiring or hoses, or interfere with other parts.
1. Make sure you have the anti-theft code for the audio system and the navigation system (if equipped), then write down the XM radio presets.
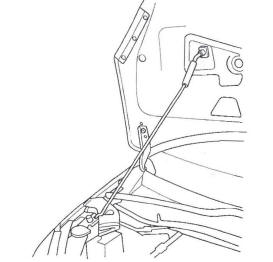
2. Remove the hood support rod, then use it as shown to prop the hood in the wide-open position.
3. Relieve the fuel pressure.
4. Disconnect the negative cable from the battery first, then disconnect the positive cable.
5. Remove the battery.
6. Remove the air cleaner housing assembly.
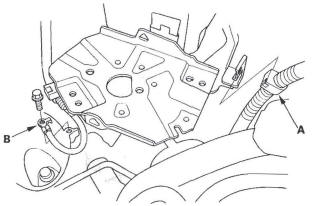
7. Remove the harness clamp (A) and ground cable (B).
8. Remove the battery cables (A) from the under-hood fuse/relay box.
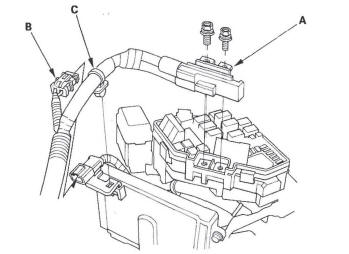
9. Disconnect the harness connector (B), and remove the harness clamp (C).
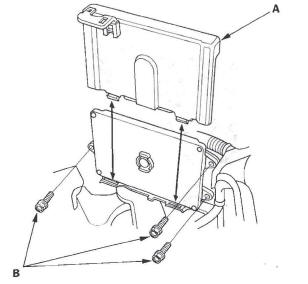
10. Remove the powertrain control module (PCM) cover (A), then remove the three bolts (B) securing the PCM.
11. Disconnect the PCM connectors (A) and the engine wire harness connector (B).
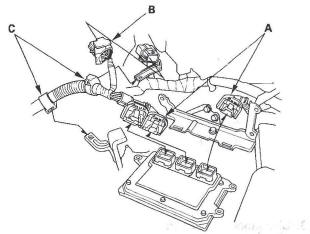
12. Remove the harness clamps (C).
13. Remove the harness clamp (A), then remove the PCM bracket (B).
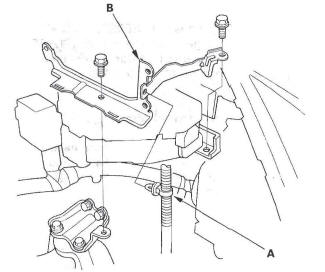
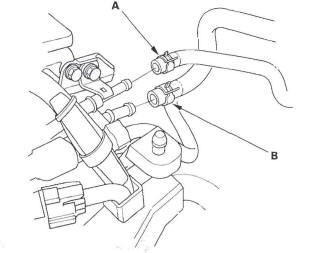
14. Remove the evaporative emission (EVAP) canister hose (A) and brake booster vacuum hose (B).
15. Remove the quick-connect fitting cover (A), then disconnect the fuel feed hose.

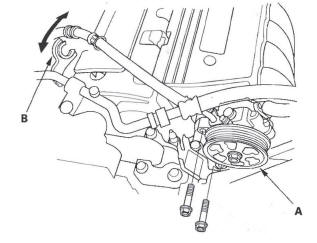
16. Remove the drive belt.
17. Remove the power steering (P/S) pump (A) without disconnecting the P/S hoses, then remove the P/S hose from the clamp (B).
18. Remove the radiator cap.
19. Raise the vehicle on the lift to full height.
20. Remove the front wheels.
21. Remove the splash shield.
22. Loosen the drain plug in the radiator, and drain the engine coolant.
23. Drain the engine oil.
24. Drain the automatic transmission fluid (ATF).
25. Disconnect the air fuel ratio (A/F) sensor connector (A) and secondary heated oxygen sensor (secondary HO2S) connector (B).
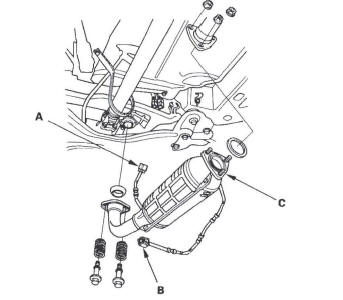
26. Remove the three way catalytic converter (TWC) (C).
27. Remove the shift cable (see step 34).
28. Separate the knuckles from the lower arms.
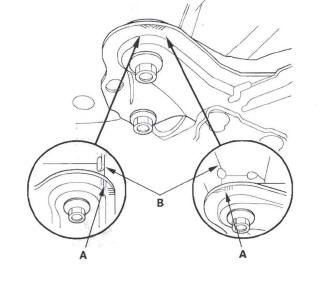
29. Remove the driveshafts (see step 7).
Coat all precision-finished surfaces with clean engine oil. Tie plastic bags over the driveshaft ends.
30. Remove the propeller shaft.
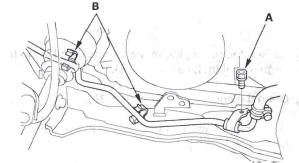
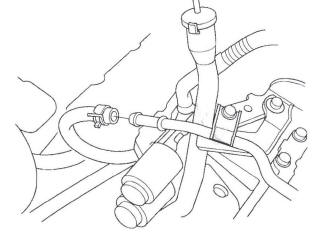
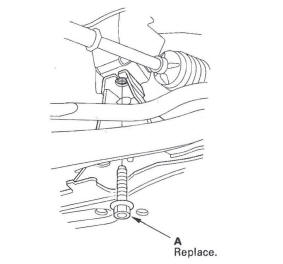
31. Remove the bolt (A) securing the P/S fluid line bracket, and unclamp the P/S fluid line clamps (B) on the front subframe.
32. Remove the bolts securing the left steering gearbox mounting bracket.
33. Remove the bolts securing the right steering gearbox mounting brackets.
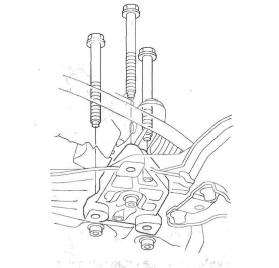
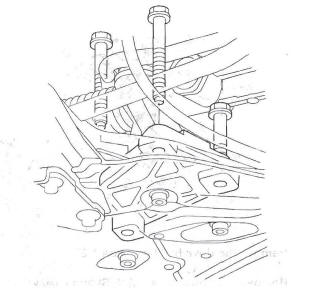
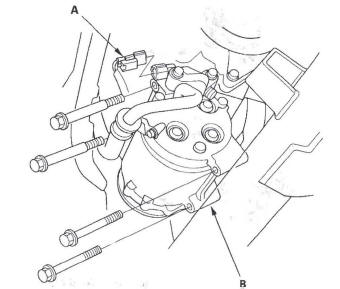
34. Disconnect the A/C compressor clutch connector (A), then remove the A/C compressor (B) without disconnecting the A/C hoses.
35. Lower the vehicle on the lift.
36. Remove the radiator.
37. Remove the ATF cooler hose, then plug the line and hose.
38. Remove the heater hoses.
39. Install the front bulkhead (see step 16).
40. Attach the special tool adapter (VS802C000015) to the threaded hole (A) in the cylinder head.
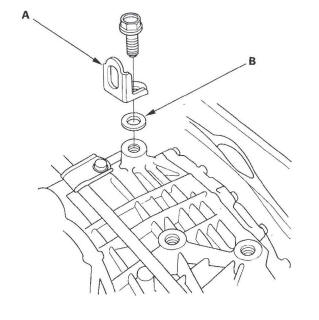
41. Remove both lids (A) from the cowl cover. Position the engine hanger adapters (VSB02C000032) over the damper flange nuts.
42. Install the engine support hanger (AAR-T-12566), then attach the hook to the slotted hole in the hanger adapter. Tighten the wing nut (A) by hand to lift and support the engine/transmission assembly.
NOTE: Be careful when working around the windshield.
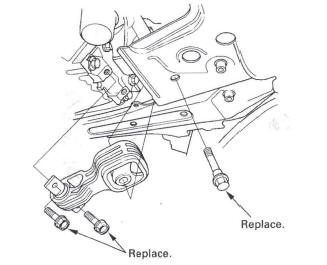
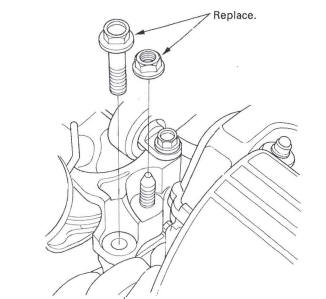
43. Raise the lift to full height.
44. Remove the lower torque rod.
45. Make the appropriate reference lines (A) at both ends of the subframe that line up with the body (B).
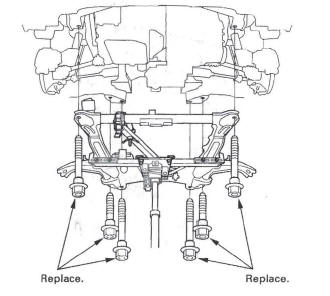
46. Remove the subframe mounting bolts (A) on both sides.
47. Attach the subframe adapter (A) to the subframe and hang the belt of the subframe adapter over the front of the subframe, then secure the belt with its stop.
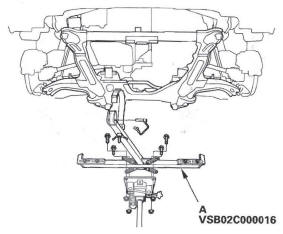
48. Raise the jack and line up the slots in the arms with the bolt holes on the corner of the jack base, then attach them with bolts securely.
49. Remove the subframe.
50. Lower the vehicle on the lift.
51. Remove the transmission mount.
52. Remove the ground cable (A), then remove the transmission mount bracket (B).

53. Install the transmission hanger bracket (P/N 21232- RCT-AOO) (A) and washer (B) on the transmission.
54. Install the universal eyelet.

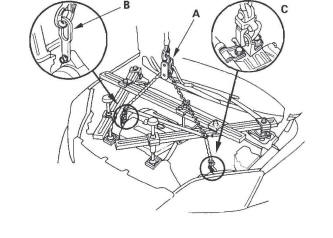
55. Attach a chain hoist (A) to the universal eyelet (B), and the transmission hook (C). Lift up on the engine/transmission assembly until it's securely supported by the chain hoist, and remove the engine support hanger.
56. Remove the side engine mount bracket mounting bolt and nut.
57. Check that the engine/transmission is completely free of vacuum hoses, fuel and coolant hoses, and electrical wiring.
58. Slowly lower the engine/transmission assembly about 150 mm (6 in.). Check once again that all hoses and electrical wiring are disconnected and free from the engine/transmission, then lower it all the way.
59. Disconnect the chain hoist from the engine/ transmission assembly.
60. Raise the vehicle all the way on the hoist, and remove the engine/transmission assembly from under the vehicle.
READ NEXT:
 Engine Installation
Special Tools Required
Universal eyelet 07 AAK-SNAA 120
Engine hanger adapter VSB02C000015 *
Front subframe adapter VSB02C000016 *
CR-V engine hanger adapter VSB02C000032 *
Engine support hanger
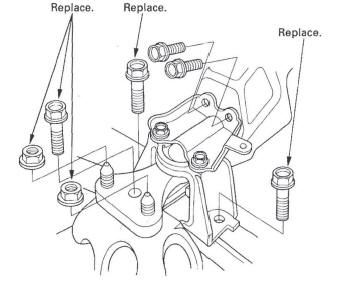
Side Engine Mount Replacement
1. Support the engine with a jack and wood block
under the oil pan.
2. Remove the power steering (P/S) fluid reservoir
from the holder.
3. Remove the upper torque rod.
4. Remove the ground cable (A
Transmission Mount Replacement
1. Loosen the upper torque rod mounting bolt (A).
2. Remove the air cleaner housing assembly.
3. Remove the powertrain control module (PCM)
cover, then remove the three bolts securing the
PCM.
4. R
SEE MORE:
Cruise Control
Cruise control allows you to maintain
a set speed above 25 mph (40 km/h)
without keeping your foot on the
accelerator pedal. It should be used
for cruising on straight, open
highways. It is not recommended for
city driving, winding roads, slippery
roads, heavy rain, or bad weather.
Remote Audio Controls
If equipped
Three controls for the audio system
are mounted in the steering wheel
hub. These let you control basic
functions without removing your
hand from the wheel.
The VOL button adjusts the volume
up ( ) or down (
). Press the top
or bottom of the button and hold it
until
