Honda CR-V: VSA OFF Switch
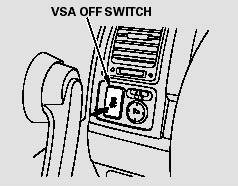
This switch is under the driver’s side vent. To turn the VSA system on and off, press and hold it until you hear a beep.
When VSA is off, the VSA off indicator comes on as a reminder.
Press and hold the switch again. It turns the system back on.
VSA is turned on every time you start the engine, even if you turned it off the last time you drove the vehicle.
In certain unusual conditions when your vehicle gets stuck in shallow mud or fresh snow, it may be easier to free it with the VSA temporarily switched off. When the VSA system is off, the traction control system is also off. You should only attempt to free your vehicle with the VSA off if you are not able to free it when the VSA is on.
Immediately after freeing your vehicle, be sure to switch the VSA on again. We do not recommend driving your vehicle with the VSA and traction control systems switched off.
READ NEXT:
 VSA and Tire Sizes
Driving with varying tire or wheel
sizes may cause the VSA to
malfunction. When replacing tires,
make sure they are the same size
and type as your original tires.
If you install winter tires,
Tire Pressure Monitoring System (TPMS)
Your vehicle is equipped with a tire
pressure monitoring system (TPMS)
that turns on every time you start the
engine and monitors the pressure in
your tires while driving.
Each tire has its o
Changing a Tire with TPMS
If you have a flat tire, the low tire
pressure indicator will come on.
Replace the flat tire with the
compact spare tire.
Each wheel (except the compact
spare tire wheel) is equippedwith a
t
SEE MORE:
DTC P050A: Cold Start Idle Air Control
System Performance Problem
NOTE: Before you troubleshoot, record all freeze data
and any on-board snapshot, and review the general
troubleshooting information.
1. Turn the ignition switch ON (II).
2. Check for Temporary DTCs or DTCs with the HDS.
Are any Temporary DTCs or DTCs other than P050A indicated? YES-Go to the
indi
System Description
The air conditioning system removes heat from the passenger compartment by
transferring heat from the ambient air
to the evaporator. The evaporator cools the air with the refrigerant that is
circulating through the evaporator. The
refrigerant expands in the evaporator, and the evaporator becomes v
