Honda CR-V: Glove Box Removal/Installation
NOTE: Take care not to scratch the dashboard and related parts.
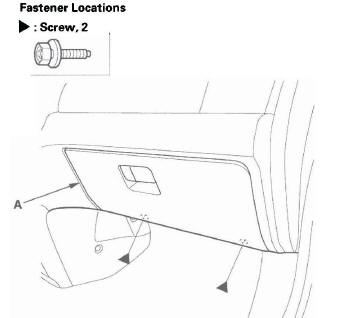
1. Open the glove box (A), and detach the hook (B) of the glove box damper. While holding the glove box, release the glove box stop (C) on each side from the dashboard by pushing them in.

2. Close the glove box (A), then remove the bolts and remove the glove box.
3. Install the glove box in the reverse order of removal.
Glove Box Damper Replacement
NOTE:
- Put on gloves to protect your hands.
- Take care not to scratch the dashboard and related parts.
1. Remove the these items:
- Glove box
- Dashboard side cover, passenger's side
2. Detach the clip of the glove box damper (A) by pinching it to release from inside the dashboard, then remove the damper.
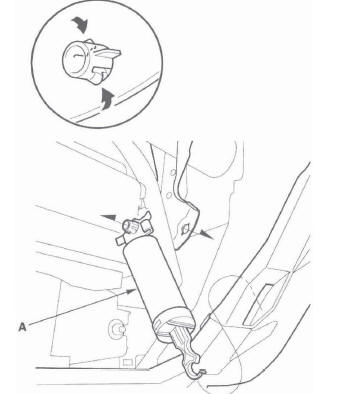
3. Install the damper in the reverse order of removal.
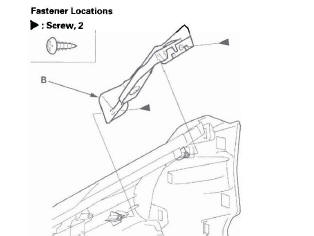
Glove Box Striker Replacement
NOTE: Take care not to scratch the dashboard and related parts.
1. For some models: Remove the glove box light (A).
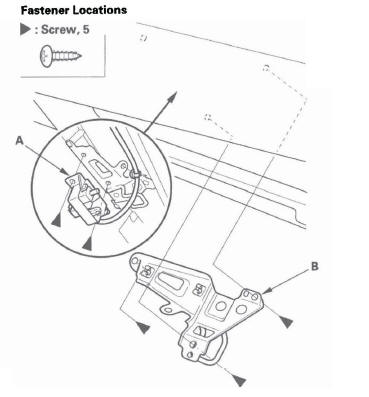
2. Detach the hook of the glove box damper and release the glove box stop on each side from the dashboard by pushing them inside (see step 1).
3. Remove the screws, then remove the glove box striker (B).
4. Install the striker in the reverse order of removal.
Dashboard Glove Box Cover Removal/Installation
NOTE: Take care not to scratch the dashboard and related parts.
1. Remove the dashboard/steering hanger beam.
2. Remove the steering/steering hanger beam from the dashboard.
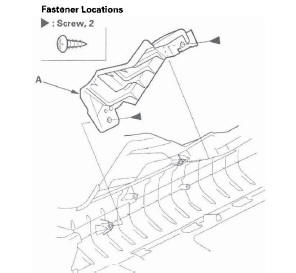
3. Remove the screws, then remove the dashboard glove box center cover (A) or the dashboard glove box outer cover (B).
Center
Outer
4. Install the cover in the reverse order of removal.
READ NEXT:
 Column Cover Removal/Installation
SRS components are located in this area. Review the
SRS component locations and the
precautions and procedures before
doing repairs or service.
NOTE: Take care not to scratch the dashboard and
relate
Seats
Component Location Index
REAR SEAT
Removal/Installation
Armrest Removal/Installation
Armrest Cover Replacement
Right Rear Seat Cover Replacement
Left Rear Seat Cover Replacement
Right S
Front Seat
Front Seat Active Head Restraint Inspection
NOTE: If the vehicle has been in a collision, always
inspect the active head restraints, even if they appear
reusable, by doing the following procedure.
Res
SEE MORE:
Seat Belt Maintenance
For safety, you should check the
condition of your seat belts regularly.
Pull each belt out fully, and look for
frays, cuts, burns, and wear. Check
that the latches work smoothly and
the belts retract easily. If a belt does
not retract easily, cleaning the belt
may correct the problem.
DTC P2135: TP Sensor A/B Voltage Incorrect
Correlation
CAUTION
Do not insert your fingers into the installed throttle
body when you turn the ignition switch ON (II) or
while the ignition switch is ON (II). If you do, you
will seriously injure your fingers if the throttle valve
is activated.
NOTE: Before you troubleshoot, record all freeze data and any o
