Honda CR-V: Alternator Removal and Installation
Removal
1. Make sure you have the anti-theft code for the audio system and the navigation system (if equipped), then write down the XM radio presets.
2. Disconnect the negative cable from the battery first, then disconnect the positive cable.
3. Remove the drive belt.
4. Remove the drive belt auto-tensioner.
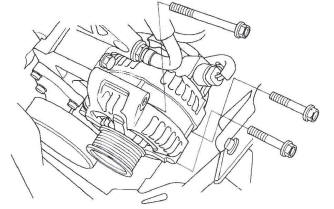
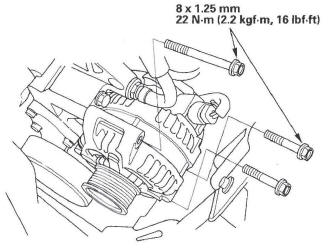
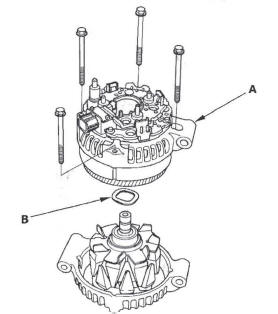
5. Remove the three bolts securing the alternator.
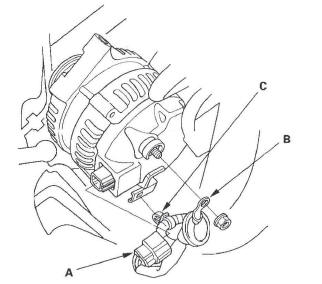
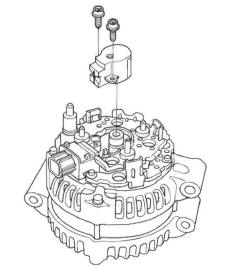
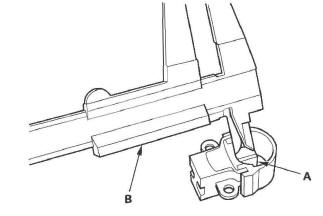
6. Disconnect the alternator connector (A), BLK wire (B), and harness clamp (C) from the alternator, then remove the alternator.
Installation
1. Connector the alternator connector (A), BLK wire (B), and harness clamp (C) to the alternator.
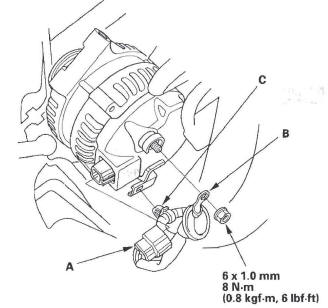
2. Tighten the three bolts securing the alternator.
3. Install the drive belt auto-tensioner.
4. Install the drive belt.
5. Connect the positive cable to the battery first, then connect the negative cable.
6. Enter the anti-theft code for the audio system and the navigation system (if equipped), then enter the XM radio presets.
7. Set the clock.
Alternator Overhaul
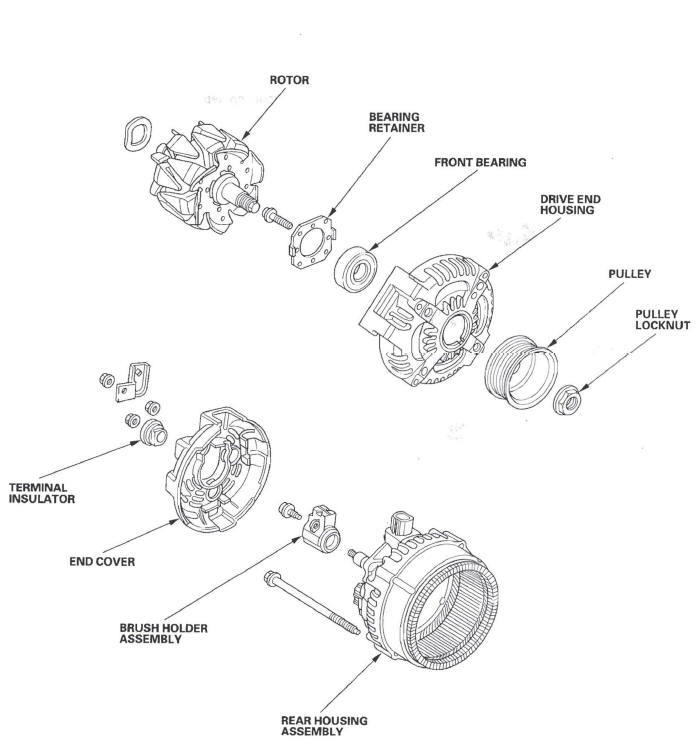
Exploded View
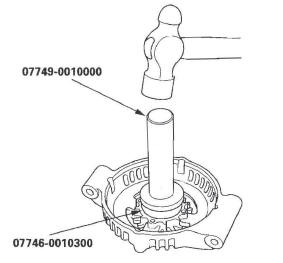
Special Tools Required
- Driver 07749-0010000
- Attachment, 42 x 47 mm 07746-0010300
NOTE: Refer to the Exploded View as needed during this procedure.
1. Test the alternator and regulator before you remove them.
2. Remove the alternator.
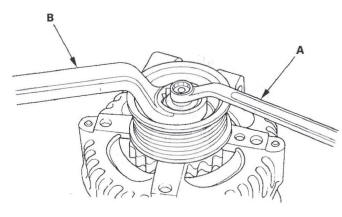
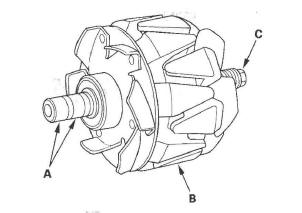
3. If the front bearing needs replacing, remove the pulley locknut with a 10 mm wrench (A) and a 22 mm wrench (B). If necessary, use an impact wrench.
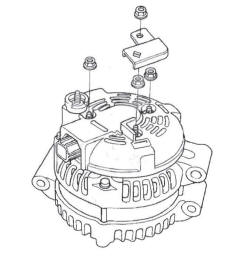
4. Remove the harness stay and the three flange nuts from the alternator.
5. Remove the end cover.

6. Remove the brush holder.
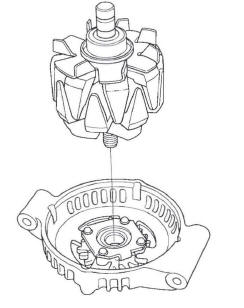
7. Remove the four bolts, then remove the rear housing assembly (A), and washer (B).
8. If you are not replacing the front bearing, go to step 13. Remove the rotor from the drive end housing.
9. Inspect the rotor shaft for scoring, and inspect the bearing journal surface in the drive end housing for seizure marks.
- If the rotor is damaged, replace the rotor assembly.
- If the rotor is OK, go to step 10.
10. Remove the front bearing retainer plate.
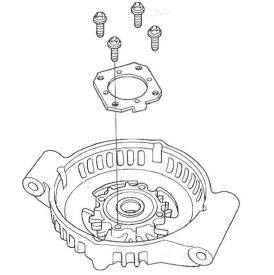
11. Drive out the front bearing with a brass drift and hammer.

12. With a hammer, driver, and attachment, install a new front bearing in the drive end housing.
Alternator Brush Inspection
13. Measure the length of both brushes (A) with vernier calipers (B).
- If either brush is shorter than the service limit, replace the brush holder assembly.
- If brush length is OK, go to step 14.
Alternator Brush Length
Standard (New): 10.5 mm (0.41 in.) Service Limit: 1.5 mm (0.06 in.)
Rotor Slip Ring Test
14. Check for continuity between the slip rings (A).
- If there is continuity, go to step 15.
- If there is no continuity, replace the rotor assembly.
15. Check for continuity between each slip ring and the rotor (B) and the rotor shaft (C).
- If there is no continuity, replace the rear housing assembly, and go to step 16.
- If there is continuity, replace the rotor assembly.
Alternator Reassembly
16. If you removed the pulley, put the rotor in the drive end housing, then tighten its locknut to 110 N*m (11.2 kgf*m, 81.0 Ibf*ft).
17. Remove any grease or any oil from the slip rings.
18. Put the rear housing assembly and drive end housing/rotor assembly together, tighten the four through bolts.
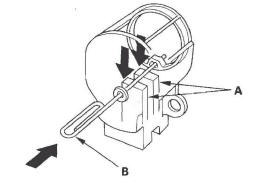
19. Push the brushes (A) in, then insert a pin or drill bit (B) (about 1.6 mm (0.06 in.) diameter) to hold them there.
20. Install the brush holder, and pull out the pin.

21. Install the end cover.
22. After assembling the alternator, turn the pulley by hand to make sure the rotor turns smoothly and without noise.
23. Install the alternator and drive belt.
READ NEXT:
 Cruise Control
Component Location Index
CRUISE MAIN INDICATOR
CRUISE CONTROL INDICATOR
CRUISE CONTROL
COMBINATION SWITCH
BRAKE PEDAL POSITION SWITCH
POWERTRAIN CONTROL MODULE (PCM)
TRANSMISSION RANGE
SEE MORE:
Operating the XM Radio
To listen to XM Radio, turn the
ignition switch to the ACCESSORY
(I) or the ON (II) position. Push the
power/volume knob to turn on the
audio system, and press the CD/XM
button. Adjust the volume by turning
the knob. The last channel you
listened to will show in the display.
You can a
Tire Pressure Monitoring System (TPMS) - Required Federal Explanation
Each tire, including the spare (if
provided), should be checked
monthly when cold and inflated to
the inflation pressure recommended
by the vehicle manufacturer on the
vehicle placard or tire inflation
pressure label.
(If your vehicle has tires of a
different size than the size indica
