Honda CR-V: Front Passenger's Airbag Replacement
Removal
1. Disconnect the negative cable from the battery, and wait at least 3 minutes before beginning work.
2. Remove the passenger's vent panel.
3. Remove the dashboard center upper panel.
4. Remove the access panel (see step 5).
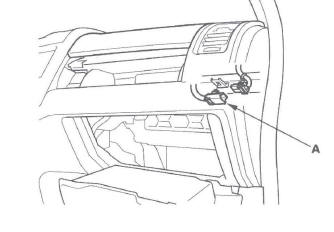
5. Detach the hook of the glove box damper and release the glove box stop on each side from the dashboard by pushing them inside (see step 1), then disconnect the front passenger's airbag 4P connector (A) from the dashboard wire harness.
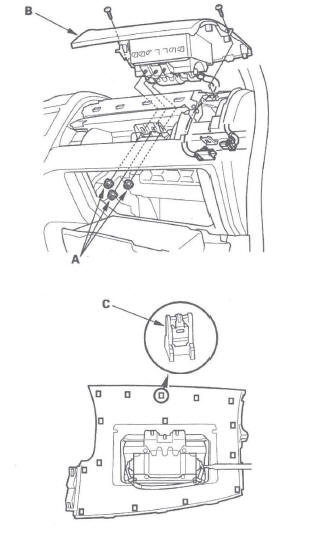
6. Remove the three mounting nuts (A) from the bracket. Using only your hands, first lift the front edge of the airbag, then lift the left side, then lift the right side, and remove the front passenger's airbag (B) from the dashboard.
NOTE: The airbag lid has pawls (C) on each side which attach it to the dashboard.
Installation
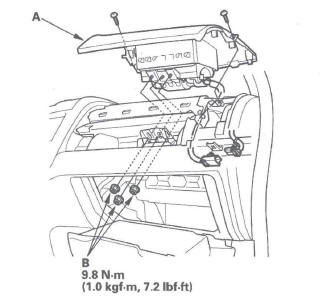
1. Place the new front passenger's airbag (A) into the dashboard. Tighten the front passenger's airbag mounting nuts (B).
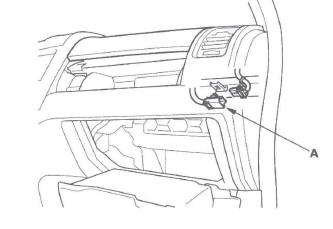
2. Connect the front passenger's airbag 4P connector (A) to dashboard wire harness, then reinstall the glove box.
3. Install the access panel (see step 5).
4. Install the dashboard center upper panel.
5. Install the passenger's vent panel.
6. Reconnect the negative cable to the battery.
7. After installing the airbag, confirm proper system operation: Turn the ignition switch ON (II); the SRS indicator should come on for about 6 seconds and then go off.
READ NEXT:
 Side Airbag Replacement
NOTE: Review the seat replacement procedure before doing repairs or service.
Removal
1. Disconnect the negative cable from the battery, and
wait at least 3 minutes before beginning work.
2. Disconnec
Airbag and Tensioner Disposal
Special Tools Required
Deployment tool 07HAZ-SG00500
Before scrapping any airbags, side airbags, side curtain
airbags, seat belt tensioners; or lap belt tensioner
(including those in a whole vehicle t
Cable Reel Replacement
Removal
1. Make sure the front wheels are aligned straight
ahead.
2. Disconnect the negative cable from the battery, and
wait at least 3 minutes.
3. Remove the driver's airbag.
4. Disconnect the co
SEE MORE:
Rear Driveshaft
Rear Driveshaft Removal
1. Raise the vehicle on a lift, and remove the rear
wheels.
2. Lift up the locking tab (A) on the spindle nut (B),
then remove the nut.
3. Drain the differential fluid.
4. Remove the rear driveshaft inboard joint from the rear differential assembly.
5. Disconnect the rear
Trim Removal/Installation
Trim Removal/Installation-Door Areas
Special Tools Required
KTC trim tool set SOJATP2014 *
* Available through the American Honda Tool and
Equipment Program; call 888-424-6857
SRS components are located in this area. Review the
SRS component locations and the
precautions and procedures before
doin
