Honda CR-V: Side Airbag Replacement
NOTE: Review the seat replacement procedure before doing repairs or service.
Removal
1. Disconnect the negative cable from the battery, and wait at least 3 minutes before beginning work.
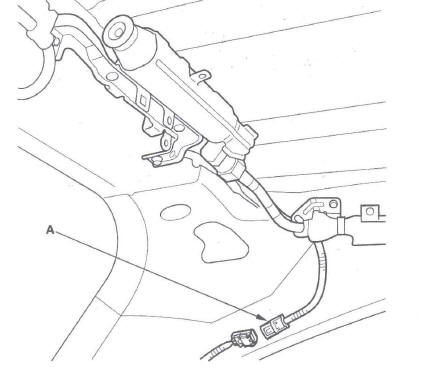
2. Disconnect the side airbag harness 2P connector (A).
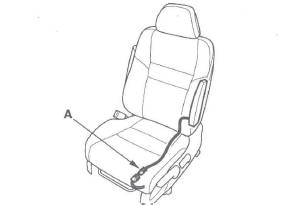
3. Remove the seat assembly and seat-back cover.
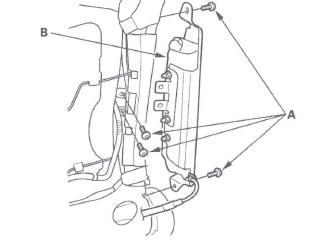
4. Remove the mounting bolts (A), then remove the side airbag (B).
Installation
NOTE:
- If the side airbag lid is secured by tape, remove the tape.
- Use new mounting bolts tightened to the specified
torque. When you replace a side airbag, make sure
that the seat-back cover is installed properly.
Improper installation may prevent proper deployment.
- Be sure to install the harness wires so that they are not pinched or interfering with other parts.
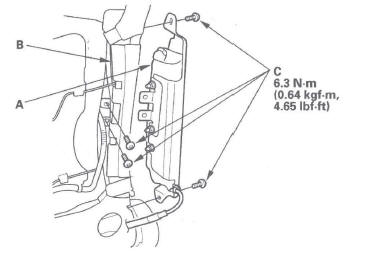
1. Place the new side airbag (A) on the seat-back frame (B). Tighten the side airbag mounting bolts (C).
2. Install the seat-back cover in the reverse order of removal.
3. Install the seat assembly, then connect the side airbag harness 2P connector.
4. Move the front seat and the seat-back through their full ranges of movement, making sure the harness wires are not pinched or interfering with other parts.
5. Reconnect the negative cable to the battery.
6. After installing the side airbag, confirm proper system operation: Turn the ignition switch ON (II); the SRS indicator should come on for about 6 seconds and then go off.
Side Curtain Airbag Replacement
Removal
NOTE:
- Review the interior trim replacement procedure before performing repair or service.
- Removal of the side curtain airbag must be performed according to the precautions/procedures described at the beginning of the SRS section.
- The side curtain airbag system consists of the side curtain airbag module, including the roof trim, all grab handle, all grab handle brackets, and shielding protector. After the side curtain airbag has been deployed, replace these parts.
1. Disconnect the negative cable from the battery, and, wait at least 3 minutes before beginning work.
2. Remove the headliner.
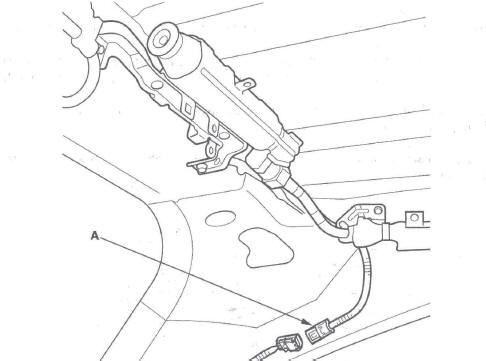
3. Disconnect the side curtain airbag 2P connector (A) from the side wire harness.
Left side shown; right side is similar.
4. Remove the mounting bolts (A) and mounting bolts (B) from the bracket. Detach clips (C) (not on all models), clips (D) and clips (E), then remove the side curtain airbag (F).
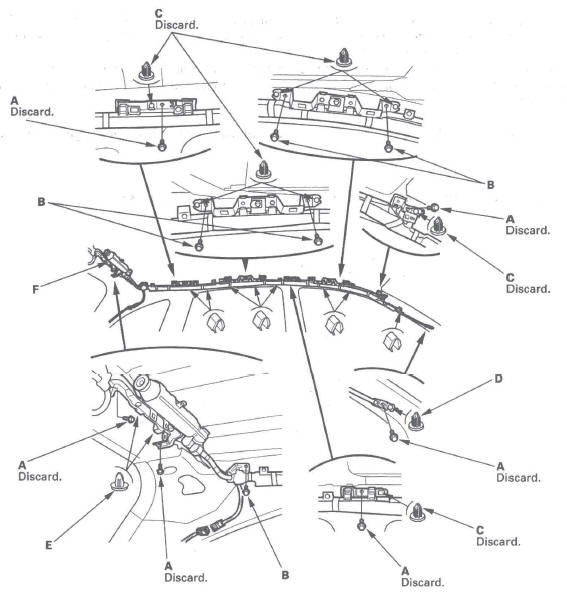
Left side shown; right side is similar.
Installation
NOTE:
- Installation of the side curtain airbag must be performed according to the precautions/procedures described at the beginning of the SRS section.
- If the airbag is frayed, or has any other visible damage, replace it. Do not attempt to repair an airbag.
- When you install the airbag, make sure it is not twisted, and that it is not caught between the inflator bracket by the bracket bolts.
- Make sure that the side curtain airbag inflator retainer is installed properly. Otherwise the airbag could accidentally deploy and cause damage or injuries.
1. Place the new side curtain airbag assembly on the side of the roof. Tighten the side curtain airbag mounting bolts (A) and mounting bolts (B).
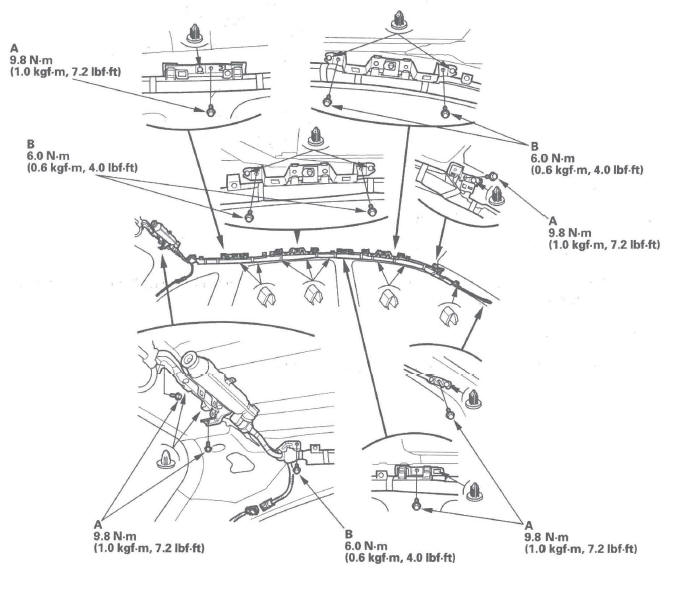
Left side shown; right side is similar.
2. Connect the side curtain airbag 2P connector (A) to the side wire harness.
Left side shown; right side is similar.
3. Reconnect the negative cable to the battery.
4. Connect the HDS, and erase the DTCs.
5. After installing the side curtain airbag, confirm proper system operation: Turn the ignition switch ON (II); the SRS indicator should come on for about 6 seconds and then go off.
6. Install all removed parts.
7. Confirm proper headliner/pillar trim overlap.
READ NEXT:
 Airbag and Tensioner Disposal
Special Tools Required
Deployment tool 07HAZ-SG00500
Before scrapping any airbags, side airbags, side curtain
airbags, seat belt tensioners; or lap belt tensioner
(including those in a whole vehicle t
Cable Reel Replacement
Removal
1. Make sure the front wheels are aligned straight
ahead.
2. Disconnect the negative cable from the battery, and
wait at least 3 minutes.
3. Remove the driver's airbag.
4. Disconnect the co
SEE MORE:
Owner’s Maintenance Checks
You should check the following
items at the specified intervals. If
you are unsure of how to perform
any check, turn to the appropriate
page listed.
Engine oil level - Check every
time you fill the fuel tank.
Engine coolant level - Check the
radiator reserve tank every time
you fill
Lower Ball Joint Replacement
Special Tools Required
Ball joint remover, 32 mm 07MAC-SL0A 102
Ball joint thread protector, 14 mm 071AF-S3VA000
1. Remove the front wheel.
2. Remove the flange bolt and flange nuts from the
lower arm (A).
NOTE: During installation, install a new flange bolt
and new flange nuts. After lightly
