Honda CR-V: Front Driveshaft Reassembly
Exploded View
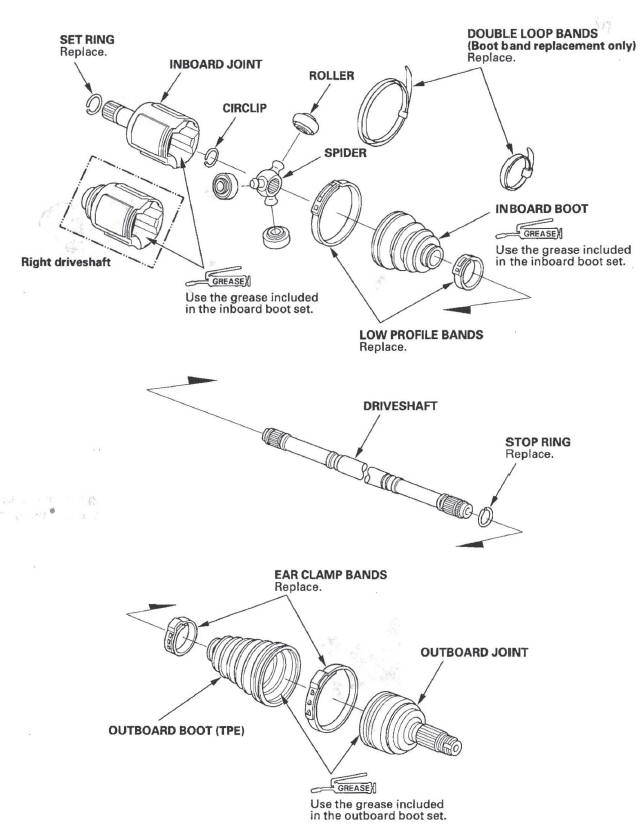
NOTE: Refer to the Exploded View as needed during this procedure.
Inboard Joint Side
1. Wrap the splines with vinyl tape (A) to prevent damaging to the inboard boot.
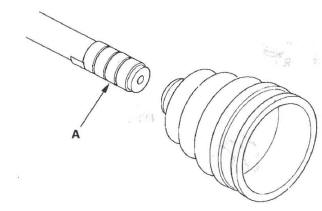
2. Install the inboard boot onto the drives haft, then remove the vinyl tape. Be careful not to damage the inboard boot.
3. Install the spider (A) onto the driveshaft by aligning the marks (B) you made on the spider and the end of the drives haft.
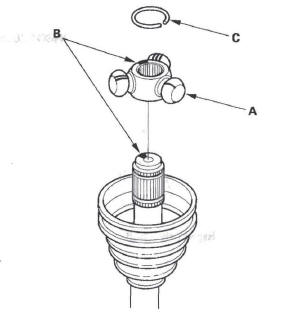
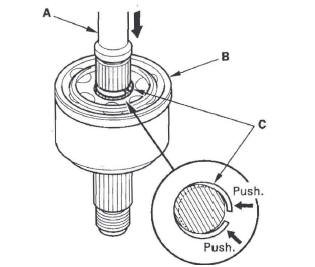
4. Install the circlip (C) into the driveshaft groove.
Rotate the circlip in its groove to make sure it is fully seated.
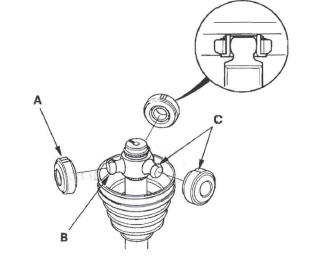
5. Fit the rollers (A) onto the spider (B) with their high shoulders facing outward, and note these items:
- Reinstall the rollers in their original positions on the spider by aligning the marks (C) you made.
- Hold the driveshaft pointing* up to prevent the rollers from falling off.
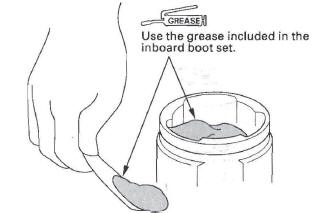
6. Pack the inboard joint with the joint grease included in the inboard boot set.
Grease quantity
Inboard joint: 150-160 g (5.3-5.6 oz)
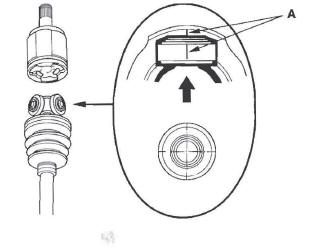
7. Fit the inboard joint onto the driveshaft, and note these items:
- Reinstall the inboard joint onto the driveshaft by aligning the marks (A) you made on the inboard joint and the rollers.
- Hold the driveshaft so the inboard joint is pointing up to prevent it from falling off.
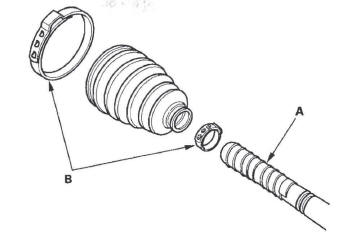
8. Fit the boot ends onto the driveshaft and the inboard joint, then install the new boot band onto the boot.
9. Repeat step 8 for the band on the other end of the boot.
Outboard Joint Side
1. Wrap the splines with vinyl tape (A) to prevent damaging the outboard boot.
2. Install the new ear clamp bands (B) and outboard boot, then remove the vinyl tape. Be careful not to damage the outboard boot.
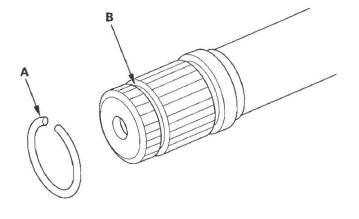
3. Install the new stop ring (A) into the driveshaft groove (B).
4. Pack about half of the grease included in the new outboard boot set into the driveshaft hole in the outboard joint. Insert the driveshaft (A) into the outboard joint (B) until the stop ring (C) is closed.
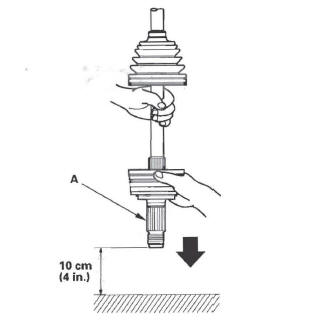
5. To completely seat the outboard joint, pick up the driveshaft and joint, and tap or hit them from a height of about 10 cm (4 in.) onto a hard surface. Do not use a hammer as excessive force may damage the driveshaft. Be careful not to damage the threaded section (A) of the outboard joint.
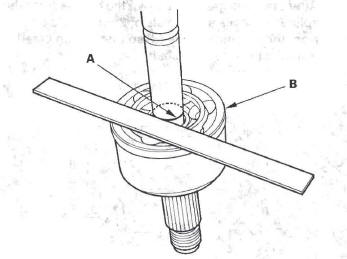
6. Check the alignment of the paint mark (A) you made with the outboard joint end (B).
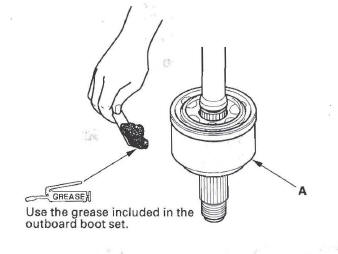
7. Pack the outboard joint (A) with the remaining joint grease included in the new outboard boot set.
Grease quantity
Outboard joint: 140-150 g (4.9-5.3 oz)
8. Fit the boot ends (A) into the driveshaft (B) and outboard joint (C) grooves.
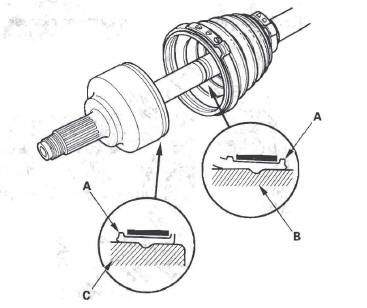
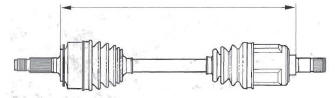
9. Adjust the length of the driveshafts to the figure below then adjust the boots to halfway between full compression and full extension. Make sure the ends of the boots seat in the groove of the driveshaft and joint. Doing this prevents a vacuum or too much air in the boot, preventing it from compressing or extending properly.
Left driveshaft: 463-468 mm (18.2-18.4 in.)
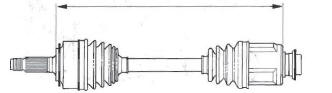
Right driveshaft: 544-549 mm (21.4-21.6 in.)
10. Install the new ear clamp band onto the boot.
11. Repeat steps 10 for the band on the other end of the boot.
READ NEXT:
 Front Driveshaft Installation
1. Apply grease to the contact area (A) of the outboard
joint and front wheel bearing.
NOTE: Failure to apply grease may cause excessive
noise and vibration.
2. Install a new set ring (A) onto the s
Intermediate Shaft
Intermediate Shaft Removal
1. Drain the automatic transmission fluid. Reinstall the drain plug with a
new washer.
2. Remove the right driveshaft.
3. Remove the flange bolt (A) and two dowel bolts (
Rear Driveshaft
Rear Driveshaft Removal
1. Raise the vehicle on a lift, and remove the rear
wheels.
2. Lift up the locking tab (A) on the spindle nut (B),
then remove the nut.
3. Drain the differential fluid.
4. R
SEE MORE:
Dust and Pollen Filter
This filter removes the dust and
pollen that is brought in fromthe
outside through the heating and
cooling system/climate control
system.
Have your dealer replace this filter
when this service is indicated by a
maintenance message on the
information display. It should be
replaced ev
Seat Belt Maintenance
For safety, you should check the
condition of your seat belts regularly.
Pull each belt out fully, and look for
frays, cuts, burns, and wear. Check
that the latches work smoothly and
the belts retract easily. If a belt does
not retract easily, cleaning the belt
may correct the problem.
