Honda CR-V: Glass
Honda CR-V (2006–2011) Service Manual / Body / Glass
Component Location Index
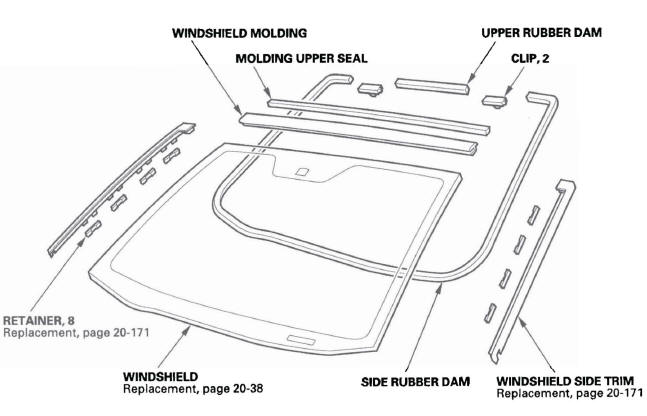
- WINDSHIELD MOLDING
- MOLDING UPPER SEAL
- UPPER RUBBER DAM
- CLIP, 2
- WINDSHIELD SIDE TRIM
- SIDE RUBBER DAM
- WINDSHIELD
- RETAINER,8
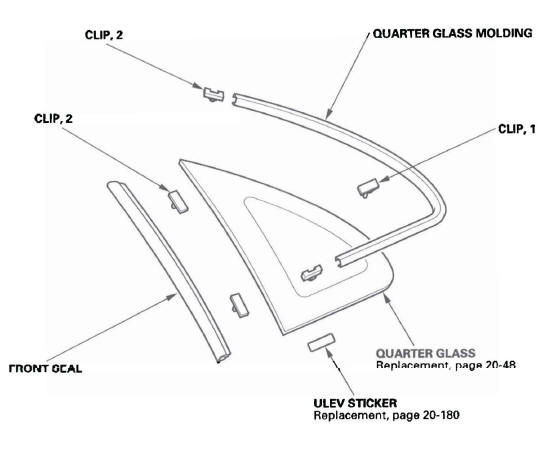
- QUARTER GLASS MOLDING
- CLIP, 1
- CLIP, 2
- QUARTER GLASS
- ULEV STICKER
- FRONT SEAL
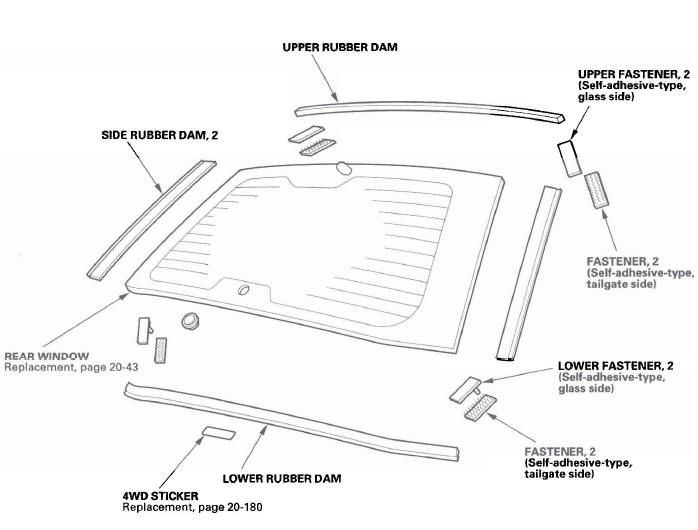
- UPPER RUBBER DAM
- UPPER FASTENER 2
- FASTENER 2
- LOWER FASTENER 2
- LOWER RUBBER DAM
- 4 WD STICKER
- REAR WINDOW
READ NEXT:
 Windshield Replacement
NOTE:
Put on gloves to protect your hands.
Wear eye protection when removing the glass with
piano wire.
Use seat covers to avoid damaging the seat.
When replacing a broken windshield, a commerci
Rear Window Replacement
NOTE:
Put on gloves to protect your hands.
Wear eye protection when removing the glass with
piano wire.
Use seat covers to avoid damaging any surfaces.
Do not damage the rear window defogger gri
Quarter Glass Replacement
NOTE:
Put on gloves to protect your hands.
Wear eye protection when removing the glass with
piano wire.
Use seat covers to avoid damaging any surfaces.
The quarter glass molding will need replac
SEE MORE:
Installing a Child Seat with a Tether
A child seat with a tether can be
installed in any seating position in
the back seat.
Each rear outside seating position
has an anchorage point on the seatback,
and the center seating position
has an anchorage point in the ceiling
near the tailgate.
Since a tether can provide additiona
Knuckle/Hub/Wheel Bearing Replacement
Exploded View
Special Tools Required
Hub dis/assembly tool 07GAF-SD40100
Ball joint remover, 32 mm 07MAC-SL0A102
Ball joint remover, 28 mm 07MAC-SL0A202
Ball joint thread protector, 14 mm 071AF-S3VA000
Attachment, 72 x 75 mm 077 46-0010600
Driver 077 49-0010000
Attachment, 96 mm 07948-SB001
© 2016-2026 Copyright www.hcrv.net
