Honda CR-V: Fuel Fill Door
Fuel Fill Door Adjustment
1. Remove the nut (A), then remove the open spring (B).

2. Slightly loosen the hinge mounting bolts (A).
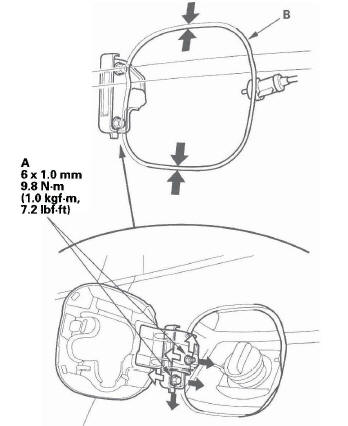
3. Adjust the fuel fill door (B) in or out until it's flush with the body, and up or down as necessary to equalize the gaps.
4. Tighten the hinge mounting bolts.
5. Check that the fuel fill door opens properly and locks securely, and check that the rear of the door is flush with the body.
6. Reinstall the open spring and nut.
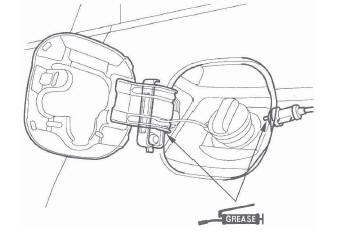
7. Apply multipurpose grease to each location indicated by the arrows.
8. Apply touch-up paint to the hinge mounting bolts and around the hinges.
Fuel Cap Adapter Replacement
NOTE: Take care not to scratch the body.
1. Remove the fuel pipe protector.
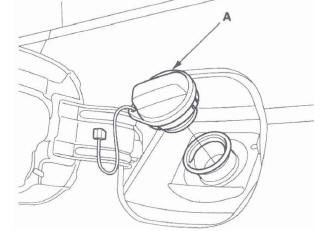
2. Remove the cap (A) by turning it counterclockwise.
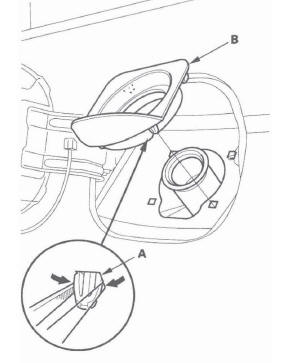
3. From under the body, push out the hooks (A). Then turn the fuel cap adapter (B), and remove it from the fuel pipe.
4. Install the adapter in the reverse order of removal.
READ NEXT:
 Upper/Lower Front Grille Replacement
Upper Front Grille Replacement
NOTE: Take care not to scratch the bumper and grille.
1. Remove the front bumper.
2. Remove the clips from the back of the front grille
and release the hooks (A), then
Cowl Cover Replacement
Special Tools Required
KTC trim tool set SOJATP2014 *
* Available through the American Honda Tool and
Equipment Program; call 888-424-6857
NOTE:
Put on gloves to protect your hands.
Take care not t
SEE MORE:
Emergency Towing
If your vehicle needs to be towed,
call a professional towing service or
organization. Never tow your vehicle
with just a rope or chain. It is very
dangerous.
On 4WD models
The only way you can safely tow
your vehicle is with flat-bed
equipment. The operator will load
Any other metho
Tire Pressure Monitoring System (TPMS) - Required Federal Explanation
Each tire, including the spare (if
provided), should be checked
monthly when cold and inflated to
the inflation pressure recommended
by the vehicle manufacturer on the
vehicle placard or tire inflation
pressure label.
(If your vehicle has tires of a
different size than the size indica
