Honda CR-V: Center Upper Dashboard Panel Removal/Installation
Special Tools Required
KTC trim tool set SOJATP2014 *
* Available through the American Honda Tool and Equipment Program; call 888-424-6857
NOTE:
- Put on gloves to protect your hands.
- Use the appropriate tool from the KTC trim tool set to avoid damage when prying components.
- Take care not to scratch the dashboard and related parts.
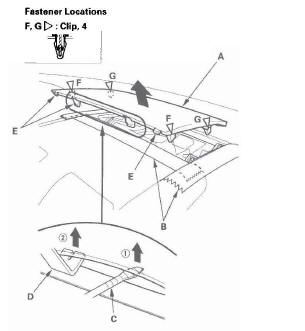
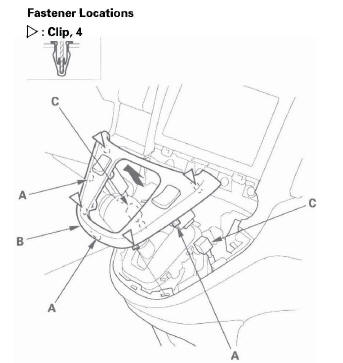
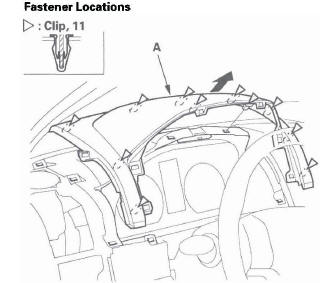
1. Remove the center upper dashboard panel (A).
- Apply protective tape (B) on the dashboard
panel next to the center upper dashboard panel.
Pry the middle edge of the panel up with a flat tip screwdriver (C) wrapped with protective tape.
- While carefully lifting the panel with a flat-tip screwdriver, insert the trim tool (D) into the gap between the dashboard and the panel. Use the trim tool to gently pry the panel up partially to release the hooks (E) and clips (F), then pull the panel up to release the clips (G).
2. Install the panel in the reverse order of removal, and note these items:
- Check if the clips are damaged or stress-whitened, and if necessary, replace them with new ones.
- Push the clips into place securely.
Dashboard Center Vent Removal/Installation
Special Tools Required
KTC trim tool set SOJATP2014 *
* Available through the American Honda Tool and Equipment Program; call 888-424-6857
NOTE:
- Put on gloves to protect your hands.
- Use the appropriate tool from the KTC trim tool set to avoid damage when prying components.
- Take care not to scratch the dashboard and related parts.
1. Remove the center upper dashboard panel.
2. From the center upper dashboard panel opening, pull the edges of the dashboard center vent (A) slightly toward you to release the clips.
NOTE: If the vent is pulled upward, the audio panel (B) will be damaged.
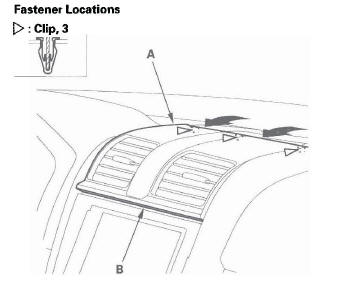
3. Detach the lower clips, and release the hooks (A) by pulling the dashboard center vent (B) back.
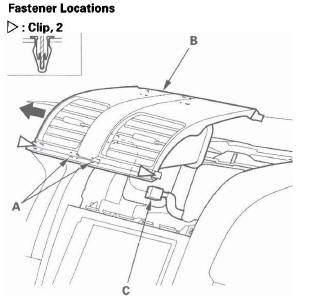
4. Disconnect the hazard warning switch connector (C), and remove the center vent.
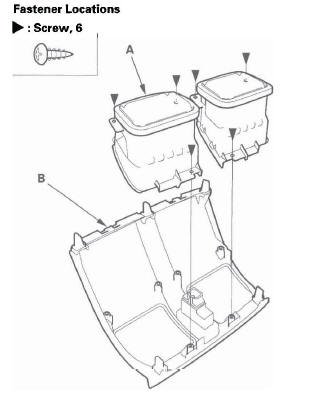
5. If necessary, remove the screws, then remove the center vent (A) from the vent panel (B).
6. Install the center vent in the reverse order of removal, and note these items:
- Check if the clips are damaged or stress-whitened, and if necessary, replace them with new ones.
- Push the clips into place securely.
- Make sure the connector is plugged in properly.
Shift Lever Panel Removal/Installation
Special Tools Required
KTC trim tool set SOJATP2014 *
* Available through the American Honda Tool and Equipment Program; call 888-424-6857
NOTE:
- Put on gloves to protect your hands.
- Use the appropriate tool from the KTC trim tool set to avoid damage when prying components.
- Take care not to scratch the dashboard and related parts.
1. Remove the HVAC control unit.
2. From the heater control panel opening, detach the clips and hooks (A) by pulling the shift center panel (B) up. Disconnect the seat heater switch connectors (C) if equipped.
3. Install the panel in the reverse order of removal, and note these items:
- Check if the clips are damaged or stress-whitened, and if necessary, replace them with new ones.
- Push the clips into place securely.
- Make sure the connectors are plugged in properly.
Dashboard Center Lower Cover Removal/Installation
Special Tools Required
KTC trim tool set SOJATP2014 *
* Available through the American Honda Tool and Equipment Program; call 888-424-6857
NOTE:
- Put on gloves to protect your hands.
- Use the appropriate tool from the KTC trim tool set to avoid damage when prying components.
- Take care not to scratch the dashboard and related parts.
1. Remove the front console cover, both sides.
2. Remove the screw.
3. Gently pull out upper of the dashboard center lower cover (A) to release the clips, then remove the cover.
4. Disconnect the front accessory power socket connector (B).
5. Install the panel in the reverse order of removal, and note these items:
- Check if the clips are damaged or stress-whitened, and if necessary, replace them with new ones.
- Push the clips into place securely.
- Make sure the connector is plugged in properly.
Dashboard Center Trim Removal/Installation
Special Tools Required
KTC trim tool set SOJATP2014 *
* Available through the American Honda Tool and Equipment Program; call 888-424-6857
NOTE:
- Put on gloves to protect your hands.
- Use the appropriate tool from the KTC trim tool set to avoid damage when prying components.
- Take care not to scratch the dashboard and related parts.
1. Remove these items:
- Center upper dashboard panel
- Dashboard center vent
- HVAC control unit
- Driver's vent panel
- Passenger's vent panel
- Shift lever panel
- Instrument panel
- Front passenger's airbag
- Navigation display unit, with navigation system
- Audio unit
2. Remove the screws.
3. Gently pull out the dashboard center trim (A) to release the clips, then remove the trim.
4. Install the trim in the reverse order of removal, and note these items:
- Check if the clips are damaged or stress-whitened, and if necessary, replace them with new ones.
- Push the clips into place securely.
Instrument Upper Visor Removal/Installation
Special Tools Required
KTC trim tool set SOJATP2014 *
* Available through the American Honda Tool and Equipment Program; call 888-424-6857
NOTE:
- Use the appropriate tool from the KTC trim tool set to avoid damage when prying components.
- Take care not to scratch the dashboard and related parts.
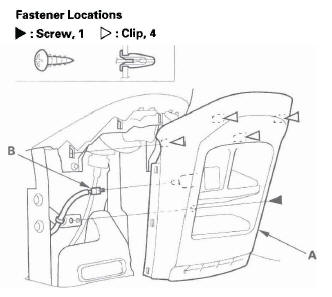
1. Release the tilt/telescopic lock lever, tilt the steering wheel fully down, and pull it full out.
2. Gently pull out on the upper edge of the instrument upper visor (A) to detach the upper clips.
3. Detach the lower clips, and release the hooks (A) by pulling the instrument upper visor (B) back.

4. Install the visor in the reverse order of removal, and note these items:
- Check if the clips are damaged or stress-whitened, and if necessary, replace them with new ones.
- Push the clips into place securely.
Instrument Panel Removal/Installation
Special Tools Required
KTC trim tool set SOJATP2014 *
* Available through the American Honda Tool and Equipment Program; call 888-424-6857
NOTE:
- Put on gloves to protect your hands.
- Use the appropriate tool from the KTC trim tool set to avoid damage when prying components.
- Take care not to scratch the dashboard and related parts.
1. Remove these items:
- Driver's vent panel
- Center upper dashboard panel
- Instrument upper visor
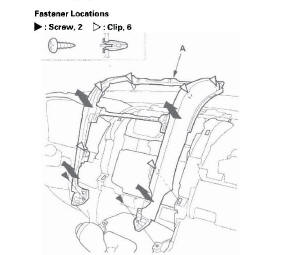
2. Gently pull up the instrument panel (A) by hand from the driver's vent panel and center upper panel openings to release the clips.
3. Install the panel in the reverse order of removal, and note these items:
- Check if the clips are damaged or stress-whitened, and if necessary, replace them with new ones.
- Push the clips into place securely.
READ NEXT:
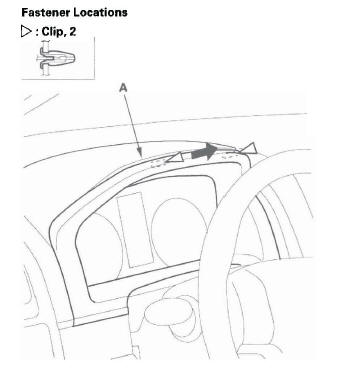
 Driver's Vent Panel Removal/Installation
Special Tools Required
KTC trim tool set SOJATP2014 *
* Available through the American Honda Tool and
Equipment Program; call 888-424-6857
NOTE:
Put on gloves to protect your hands.
Use the appropr
Passenger's Tray Removal/Installation
Special Tools Required
KTC trim tool set SOJATP2014 *
* Available through the American Honda Tool and
Equipment Program; call 888-424-6857
SRS components are located in this area. Review the SRS compo
Glove Box Removal/Installation
NOTE: Take care not to scratch the dashboard and
related parts.
1. Open the glove box (A), and detach the hook (B) of
the glove box damper. While holding the glove box,
release the glove box stop (C)
SEE MORE:
Transmission Mount Replacement
1. Loosen the upper torque rod mounting bolt (A).
2. Remove the air cleaner housing assembly.
3. Remove the powertrain control module (PCM)
cover, then remove the three bolts securing the
PCM.
4. Remove the PCM bracket.
5. Support the transmission with a jack and wood
block under the transmissio
Rearview Camera and Monitor
On EX-L model with navigation system
Whenever you shift to reverse (R)
with the ignition switch in the ON
(II) position, the rearview is shown
on the navigation system screen.
For the best picture, always keep the
rearview camera clean, and do not
cover the camera lens. To avoid
scra
