Honda CR-V: Automatic Transmission Fluid

Check the fluid level with the engine at normal operating temperature.
1. Park the vehicle on level ground.
Start the engine, let it run until the radiator fan comes on, then shut off the engine. For accurate results, wait about 60 seconds (but no longer than 90 seconds) before doing step 2.

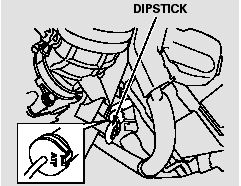
2. Remove the dipstick (yellow loop) from the transmission, and wipe it with a clean cloth.
3. Insert the dipstick all the way into the transmission securely as shown in the illustration.
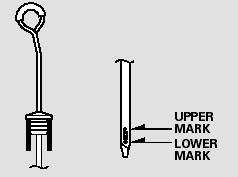
4. Remove the dipstick and check the fluid level. It should be between the upper and lower marks.
5. If the level is below the lower mark, add fluid into the dipstick hole to bring it to the level between the upper and lower marks.
Pour the fluid slowly and carefully so you do not spill any. Clean up any spill immediately; it could damage components in the engine compartment.
Always use Honda Genuine ATF-Z1 (automatic transmission fluid).

Use only Honda Genuine ATF-Z1 (automatic transmission f luid). Do not mix with other transmission f luids.
Using transmission f luid other than Honda Genuine ATF-Z1 may cause deterioration in transmission operation and durability, and could result in damage to the transmission.
Damage resulting from the use of transmission f luid other than Honda Genuine ATF-Z1 is not covered by the Honda new vehicle warranty.
6. Insert the dipstick all the way back into the transmission securely as shown in the illustration.
Make sure the rubber cap on the dipstick fits in the dipstick guide and that you push the dipstick in all the way.
If you are not sure how to add fluid, contact your dealer.

