Honda CR-V: Additional Information on Recommended Discs
Honda CR-V (2006–2011) Owner's Manual / Features / Protecting Your Discs / Additional Information on Recommended Discs
The disc player/changer has a sophisticated and delicate mechanism. If you insert a damaged disc as indicated in this section, it may become stuck inside and damage the audio unit.
Examples of these discs are shown to the right:
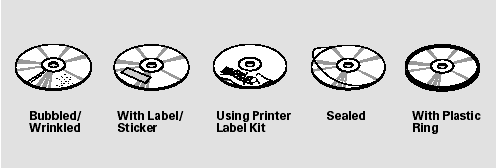
1. Bubbled, wrinkled, labeled, and excessively thick discs
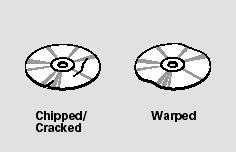
2. Damaged discs
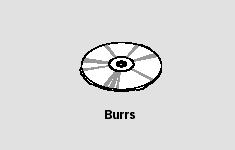
3. Poor quality discs

4. Small, irregular shaped discs
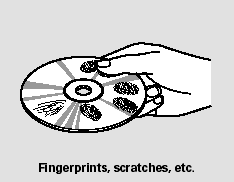
5. Discs with scratches, dirty discs
CD-R or CD-RW may not play due to the recording conditions.
Scratches and fingerprints on the discs may cause the sound to skip.

Recommended discs are printed with the following logo.

Audio unit may not play the following formats.
READ NEXT:
 Remote Audio Controls
If equipped
Three controls for the audio system
are mounted in the steering wheel
hub. These let you control basic
functions without removing your
hand from the wheel.
The VOL button adjus
Playing an Optional Audio Unit
Your vehicle has the auxiliary input
jack on the front panel, on the center
table, or in the console compartment,
depending on models. The system
will accept auxiliary input from
standard
Radio Theft Protection
Your vehicle’s audio system will
disable itself if it is disconnected
from electrical power for any reason.
To make it work again, you must
enter a specific code using the preset
buttons (i
SEE MORE:
DTC P0101: MAF Sensor Range/Performance Problem
NOTE:
Before you troubleshoot, record all freeze data and
any on-board snapshot, and review the general
troubleshooting information.
If DTC P1128, P1129, P2228, and/or P2229 are stored
at the same time as DTC P0101, troubleshoot those
DTCs first, then recheck for DTC P0101.
1. Check for poor
Damper/Spring
Damper/Spring Removal and Installation
Removal
1. Turn the ignition switch ON (II), then turn on the
windshield wipers. Turn the ignition switch off
when the wipers are near the A-pillars.
2. Raise the front of the vehicle, and support it with safety stands in the
proper locations.
3. Remove th
© 2016-2026 Copyright www.hcrv.net
